Architectural models are a great way to showcase building and design concepts. But physical models can be time-consuming and expensive to create. That's where digital rendering comes in. With the right software, you can create jaw-dropping architecture model render quickly and easily. In this post, we'll explore how to use Vray to create beautiful architecture model renders with minimal effort.
Overview
Vray is a powerful rendering engine that works with many 3D modeling programs. It's known for its ability to produce photorealistic results. In the provided script, we use Vray in 3ds Max to recreate a physical architecture model render.
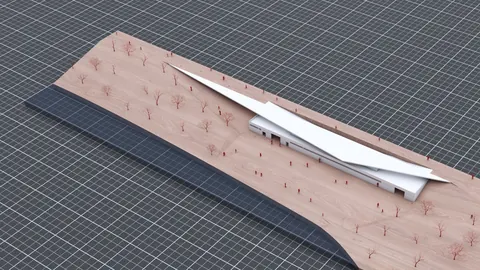
The original reference image depicts a conceptual Shanghai World Expo project. It was designed by Anttinen Oiva Architects. The physical model has a wooden base and white exterior materials. Daylight illuminates the model from the left, creating soft shadows on the right.
We'll replicate the same lighting conditions, materials, and overall style. When finished, our digital architecture model render will closely match the original photo.
Setting Up the Scene
First, we need to set up some basic lighting. A Rectangle Light mimics the daylight. Placing it high at a 45 degree angle shines light down from the left.
An HDRI (high dynamic range image) creates ambient lighting and reflections. This surrounds the model with realistic illumination. A subtle sky image works best.
Tweaking the intensity of the Rectangle Light and HDRI dial in soft shadows matching the reference. Making the light wider also enlarges the shadows.
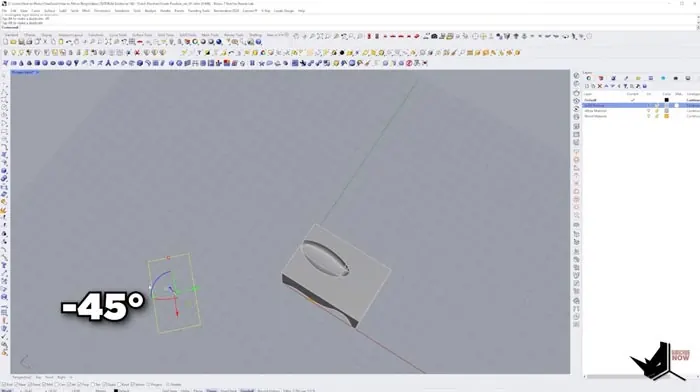
Positioning the camera angle gives a similar perspective as the original photo. This step is important for matching the look and feel.
Dialing in Materials
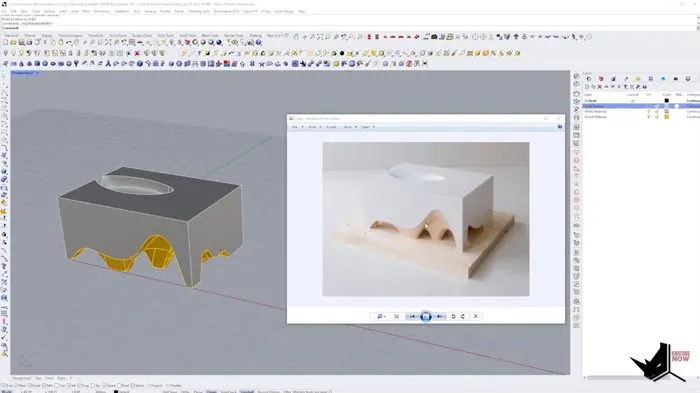
With lighting in place, we turn our focus to materials. The exterior needs a clean white finish. In Vray, a white matte material with slight reflectivity replicates the physical model.
For the wooden base, a material from Chaos Cosmos provides realistic wood grain. Adjustments to the texture mapping and color balance enhance the likeness.
The interior wooden elements use a separate wood material and mapping. This breaks up the different colors and patterns. Playing with the color offsets increases variation between the materials.
A quick render check verifies everything is shaping up nicely. But some small tweaks take it to the next level.
Adding Finishing Touches
The render looks good, but needs some polish to match the original. Boosting contrast and warming the tones in Photoshop brings it closer.
Here are the steps:
- Adjust levels, curves, and exposure for lighting contrast
- Create a Hue/Saturation layer for color tinting
- Use a layer mask to isolate adjustment to key areas
- Lower layer opacity to refine the effect
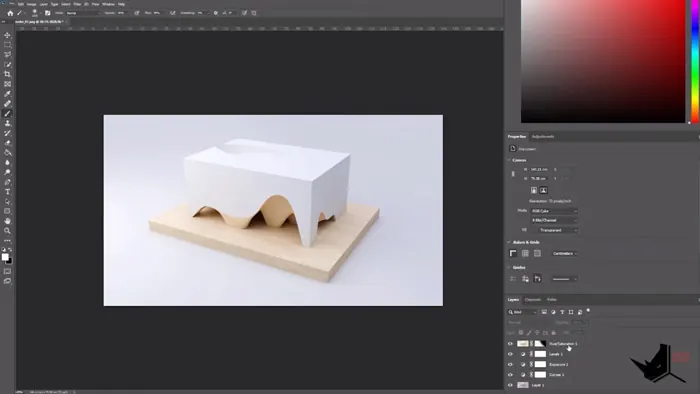
This gives the final render a striking golden look with punched-up shadows. Mimicking the physical model lighting completes the photorealistic architecture visualization.
The key steps are:
Achieving Realistic Results
As you can see, Vray makes it easy to recreate physical models as digital renders. With the right techniques, your architectural visualizations will look amazingly realistic.
- Set up proper lighting positions and intensity
- Dial in materials with accurate textures and adjustments
- Match camera angles and perspective for composition
- Use Photoshop polish to finish the look
Following these guidelines, you too can achieve jaw-dropping architecture model renders. Visualizing designs digitally saves time and money over physical models.
Give Vray and these tips a try on your next project. You'll be amazed by the photorealistic results!

Rhino for Architects Course
Give your architectural skillset a major boost with the Rhino for Architects Course. Get over 60 hours of focused training tailored specifically for architects. Master commands and techniques to model, render, and animate architectural visualizations at the highest level. Click below for more information and watch your designs come alive!