In this Grasshopper tutorial, we'll learn step-by-step how to create an attractor wall using multiple attractors and advanced techniques to control the shape. This is an intermediate to advanced level tutorial, so beginners may want to get more experience with Grasshopper before attempting this.
By the end, you'll understand how to use attractors to create complex organic shapes.
Overview of the Attractor Wall Tutorial
The main things we'll cover in this tutorial:
- Setting up multiple attractor points and curves
- Controlling the range and strength of each attractor
- Isolating which parts of the shape are affected
- Converting the curve to mesh
- Extruding the affected segments
This will allow us to create an attractor wall with smooth extruded sections shaped by the attractors.
While this may sound complex at first, breaking it down step-by-step will help you understand the logic.
Building the Attractor System
First, we'll start with a simple linear line as our base curve.
Next, we'll build out a series of attractor points and curves above and below the line. These will act to pull and shape our line.
We'll offset these attractors at varying distances from the main line. This spacing will determine the range of effect.
For each attractor, we'll also use a Scale component to control the strength. This will determine how much it can pull the line within its range.
In addition, we'll set up math components to isolate only certain segments of the line. This way we can specify which parts are affected by each attractor.
Once we have around 5 different attractor points and curves set up, we'll connect them all to the Curve Attractor component.
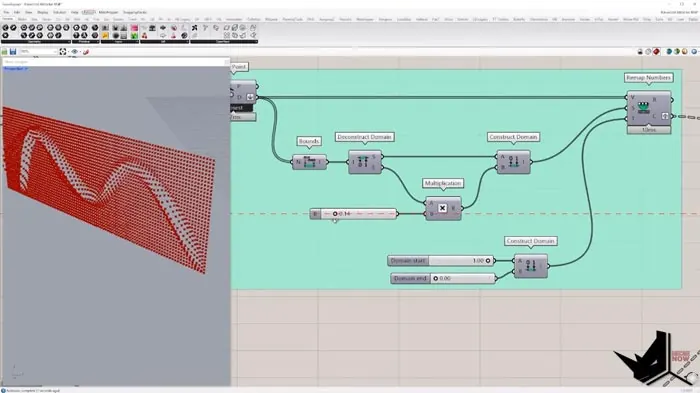
This will analyze the combined effects of all the attractors and output our final shaped curve.
By carefully controlling the position, range, strength, and isolation of each attractor, we can create very complex organic curves.
Converting to Mesh and Extruding
In the second part of the tutorial, we have our completed attractor curve. Now we need to convert it into an extruded surface.
First, we'll convert the curve to a mesh using the Weaver plugin. This divides the curve into a series of vertices and faces.
Next, we'll analyze the curve shape to identify which segments have been affected by the attractors.
We'll use a Vectors Between component to compare vertex positions. Segments with a greater vector length have been pulled further by attractors.
Using this analysis, we can isolate just the affected segments.
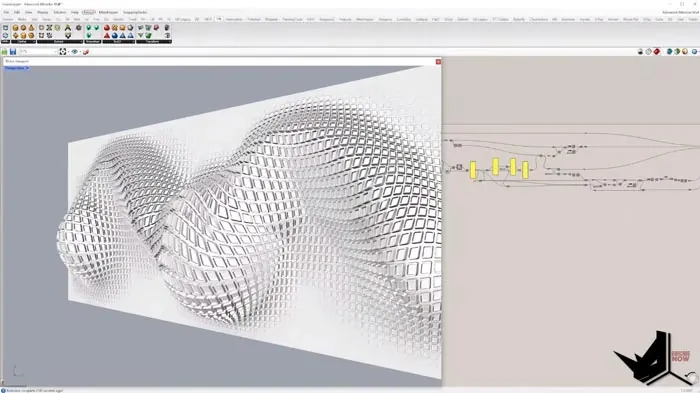
Finally, we'll use the VBU plugin to extrude these segments. We can control the height and smoothness of the extrusion.
The end result is our Attractor Wall with smooth bumps and curves based on the attractor system.
Download the Project Files
If you want to follow along and better understand these techniques, you can download the project files for this tutorial on our Patreon page.
By supporting us on Patreon, you'll get access to the Part 1 and Part 2 files for this advanced attractor tutorial.
This allows you to break down the steps at your own pace in Grasshopper. We also have extended versions of this tutorial available for supporters.
Conclusion
In this post we've covered the key steps to creating an advanced attractor wall in Grasshopper:
- Setting up attractors with control of range, strength, and isolation
- Converting the curve to mesh
- Analyzing and extruding the affected segments
The end result is an organic-shaped wall with smooth bumps based on the attractor system.
While it may seem complex at first, taking it step-by-step will help you master this powerful technique for Grasshopper.
Grasshopper Complete Course
Give your architectural skills a boost with the Grasshopper Complete Course. Get over 50 hours of comprehensive Grasshopper training tailored for architects. Learn to generate and iterate designs faster. Click below for more information and streamline your workflows!