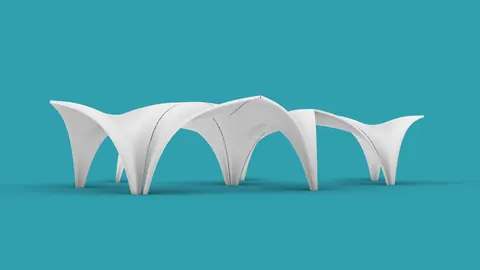
In the heart of Beijing lies a modern architectural marvel – the Chaoyang Park Plaza. Emulating the fluidity and grace of mountains and rivers, it has become a standard in contemporary design. In this tutorial, we delve into creating a replica of a part of this structure, breaking down each step to help you build a detailed 3D model that does justice to the original edifice.
Crafting the Foundations of the Chaoyang Park Plaza Model
We start our process by delineating the desired shape using NURB curves and straight lines. The objective here is to establish the fundamental outlines of the Chaoyang Park Plaza, which will serve as a blueprint as we progress through the project.

It's essential to pay close attention to details during this phase. Be prepared to constantly adjust and realign elements to get them as close to the real structure as possible, ensuring accurate representation. The 'set points' and 'move' tools will be your allies here, allowing for adjustments to achieve precision in the curves.
Understanding Offsets and Curve Adjustments
After the outlines are ready, it's time to create offsets to reflect the distinct staggered design. To do this, we employ commands such as 'duplicate border' and 'offset curve on surface,' adjusting the values to obtain the exact distances between the edges. The offset value that worked optimally was 0.5.
Next, we duplicate borders and isolate specific planes, creating curves with well-defined offsets. It's a repetitive but rewarding process, leading to a rich, detailed foundation for our model.

The Lofts: Bridging the Curves
Having prepared all the necessary curves, the following stage involves crafting lofts that bridge these curves gracefully. This is where the 'Points On' command takes center stage, allowing you to manipulate individual points and align them perfectly to form smooth, flowing surfaces, reminiscent of the fluid architecture of the Chaoyang Park Plaza.
The 'Sweep2' command is vital in this stage. It involves selecting rails and cross-section curves to form harmonious, flowing surfaces that echo the original design's contours. This iterative process requires a detailed eye to maintain consistency in every curve and corner, creating a true-to-life representation of the real thing.
Creating Solids and Final Adjustments
Creating Solids and Final AdjustmentsIn the final stages, it's essential to solidify the work done so far. Here, the 'create solid' command works wonders, helping you select surfaces and transform them into a solid structure.
The final stages demand trimming the unnecessary lines and perfecting the curves to represent the Plaza accurately. The 'trim' command is used extensively to remove excess lines and fine-tune the design to match the original.

Conclusion
This is a process of meticulous planning and execution, where every step builds upon the previous one, leading to a detailed, accurate model that reflects the Plaza's distinct design.
As you render your final model, you’ll appreciate the intricate design of the Chaoyang Park Plaza brought to life through your efforts.

Rhino for Architects Course
Give your architectural skillset a major boost with the Rhino for Architects Course. Get over 60 hours of focused training tailored specifically for architects. Master commands and techniques to model, render, and animate architectural visualizations at the highest level. Click below for more information and watch your designs come alive!