Creating complex 3D shapes and twisting designs can be challenging. However, with the powerful parametric modeling tools in Grasshopper and Rhino, you can easily build stunning complex twists and geometric shapes. In this post, we’ll walk through a step-by-step tutorial on how to model a complex twist design tower with Graph Mapper in Grasshopper.
Overview of the Complex Twist Design Process
The basic workflow we’ll follow is:
- Set up sliders to control the height and number of sides of the base polygon
- Create the polygon and array it along the Z axis to get the basic tower shape
- Use a graph mapper to scale the polygons differently along the Z-axis
- Twist the polygons with another graph mapper for rotation
- Add vertical fins and use graph mappers to vary their size, rotation, and thickness
With this process, you can create an intricate twisted tower with tapering fins. The graph mappers add variation and complexity easily. Let’s jump in and see how it works!
Creating the Base Polygon and Tower
We start by setting a reference point in Rhino. In Grasshopper, create a polygon component and connect a slider to set the number of sides - we’ll use 12 for a dodecagon.
Next, we need to array the polygon vertically. To do this, we find the normal of the polygon’s plane using the Cross Product component. Then we use a Range component to generate values to move the polygon along the normal vector. This creates the tower height.

Scaling the Polygons with a Graph Mapper
Now we want to scale the polygons differently along the Z-axis. For this, we use a Graph Mapper.
The Graph Mapper takes an input range (like the Z values) and maps it to a new output based on the graph shape. This lets us easily scale the polygons bigger and smaller to create a complex twist design.
We set up the Graph Mapper with a “Busy” graph to get a wave-like scaling effect.
Twisting the Tower with a Graph Mapper
To twist the tower into a complex twist design, we again use a Graph Mapper. This time we input an angle range and map it to twist the polygons as they go up.
Setting a range from 0 to 90 degrees gives a nice twist effect. The graph mapper lets us create a smooth twisting transition.

Adding Fins with Varying Properties
Now we can make vertical fins on each polygon by projecting lines from the polygon points. To make the fins different, we again use - you guessed it - Graph Mapper!
We vary the:
- Fin width
- Fin rotation
- Fin thickness
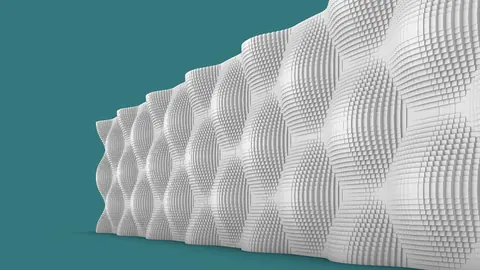
This adds detail and realism to the complex twist design, breaking up the uniformity.
Bringing It All Together
Finally, we loft and join everything to create the completed the twisted tower with tapering fins!
The Graph Mapper provided an easy way to add variation and complexity to the basic shape to achieve the complex twist design. By controlling the graph shapes, we can get totally different twisted tower effects.

Key Takeaways for Creating Complex Twist Design with Grasshopper
Some key tips for designing complex twists like this:
- Stack polygons vertically then twist and scale them to get flowing shapes
- Use Graph Mapper to easily map values like height for smooth transforms
- Add fins and vary their properties with more graph mappers to break the uniformity
- Loft and join everything when finished to get the final model
Graph Mapper is perfect for smoothly controlling values like scaling, rotation, and thickness. That’s what makes it shine for complex twist designs.
So that covers the basics of generating complex twists and designs with Grasshopper! Be sure to experiment with Graph Mapper on your own designs for organic, flowing shapes.
Grasshopper Complete Course
Give your architectural skills a boost with the Grasshopper Complete Course. Get over 50 hours of comprehensive Grasshopper training tailored for architects. Learn to generate and iterate designs faster. Click below for more information and streamline your workflows!