The Confluence Park Pavilion is a stunning structure designed by the illustrious Lake Flato Architects and Matsys design team. In this tutorial breakdown, we delve into the process of creating a Rhino architecture model by using T-splines and other essential tools in Rhino. Leveraging the powerful functionalities that Rhino offers, we embark on a meticulous journey of modeling one of the open space project's modules.
Understanding the Confluence Park Pavilion Geometry
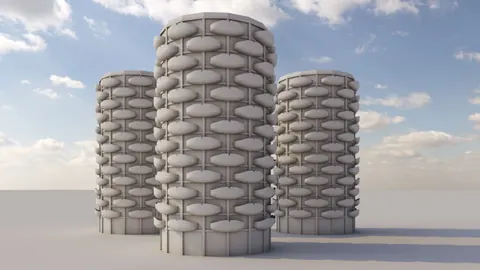
Before getting started, it's pivotal to grasp the underlying structure of the Pavilion. It embodies an intricate yet beautifully designed modular geometry, with each module comprising elements labeled A, B, and C. These elements seamlessly complement each other, fostering a harmonious structure that blossoms as they continue to grow.

The very first step is to establish a correct scale by importing a base model into Rhino. We’re using a scale where one line equals five meters, ensuring precision in the forthcoming steps. Establishing reference points and creating rectangles based on those points will aid in achieving correct scaling and forming the foundation for the module's geometry.
Harnessing the Power of T-splines
With T-splines being a central part of this tutorial, they facilitate the development of the detailed geometry of the model. The T-splines plugin allows for the manipulation and crafting of detailed 3D models with ease. Utilizing T-splines begins with creating a torus with vertical faces which acts as the initial step in crafting the model’s structure. The T-splines environment is quite adaptive, allowing for various tweaks and adjustments to ensure the geometrical fidelity to the Confluence Park Pavilion's architectural design.

Crafting the Modules with Precision
One of the pivotal aspects is to develop the individual modules that make up the pavilion accurately. Initiating this process involves rotating edges precisely using keyboard shortcuts to save time. This rotation aims to match angles as closely as possible, albeit not reaching perfection at this stage.
We will rotate all the edges and play around with them to ensure that they work harmoniously with each other. Adjustments and scaling are carried out to replicate the real thing as closely as possible.

Detailing and Final Touches
Next up is creating volleys seen in the design. The volley creation process is initiated by dividing the surfaces strategically to gain better control. This step is crucial in replicating the intricate design seen in the original project.
It's here that the intricacies of the pavilion come to life. Crafting the volleys involves manipulating the edges and vertices to form smooth transitions and achieve that unique undulating effect seen in the pavilion's design. It's a detailed process, requiring a deep understanding of 3D modeling concepts and a keen eye for design nuances.

Wrapping up with Surface Cut and Offsets
Now we have to do the final adjustments and wrap up the model. Unlocking the triangles drawn initially, we’ll get the outer shape through the curve boolean command. After achieving the desired shape, we will use offsets to replicate the transitions seen in the real design. The final stages involve splitting and cutting the geometry to get the base shape of the Confluence Park Pavilion module.
Conclusion
In conclusion, this detailed tutorial offers a comprehensive guide to crafting a Rhino architecture model of a Confluence Park Pavilion module. By following each step diligently and paying close attention to the details, aspiring architects and designers can craft a model that truly resonates with the breathtaking design of the Pavilion.

Rhino for Architects Course
Give your architectural skillset a major boost with the Rhino for Architects Course. Get over 60 hours of focused training tailored specifically for architects. Master commands and techniques to model, render, and animate architectural visualizations at the highest level. Click below for more information and watch your designs come alive!