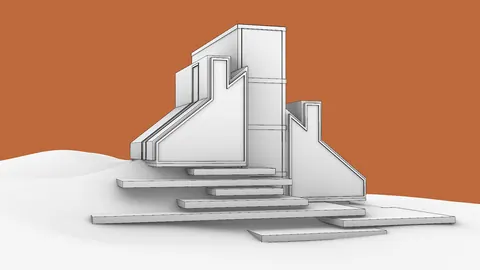
The Ekko Pavilion is an impressive wooden structure located in Denmark. It was designed by Thilo Frank and features 200 beautiful wooden frames. In this tutorial, you’ll learn how to model this project completely in Grasshopper from scratch.
Introduction to Ekko Pavilion
Grasshopper is a visual programming tool that allows you to create complex geometry and designs. In this Grasshopper tutorial, you’ll start with simple steps and build up the entire Pavilion.
The final result will look like the actual Ekko Pavilion with its iconic wooden frames. You’ll learn techniques like rotating components, cutting geometry, and adding thickness. By the end, you’ll be able to recreate this stunning pavilion and apply these skills to your own Grasshopper models.

Creating the Initial Circle
The first step is creating a circle to act as the base. You can reference a point from Rhino for the circle’s center. Then use Grasshopper’s Circle component with the point as the C input and a slider from 0-50 as the radius R input.
Next, divide this circle into segments using the Perpendicular Frames component. This will give you planes to build the wooden frames on.
Building the Wooden Frames
Use the Polygon component to create rectangles on each plane segment around the circle. Set the number of rectangle sides to 4 to create squares.
Control the square size using a slider, like 0-10. Now you have squares on each radial segment, but they need to be rotated to match the pavilion shape.
Use the Rotate component to rotate each square based on its corresponding radial plane. Calculate the rotation angle automatically based on the number of planes using the Range component.

Cutting the Squares
The squares need to be cut to create the open shape of the Ekko Pavilion frames.
Create a cutting plane positioned across the squares using the Curve Plane. Remap the plane’s distance based on the square size so it adjusts automatically.
Use Curve Plane again to find intersection points on each square. Then cut the squares in half at those points with the Shatter component.
Keep only the longer top curves and get rid of the small bottom fragments. Offset and loft the top halves to create the final wooden frame surfaces.
Adding Thickness
The frames need thickness to look real. Use the Horizontal Frames and Deconstruct Plane to get extrusion vectors.
Extrude all the surfaces outwards by a certain distance using these automated vectors. Now you have 3D wooden frame models.

Creating the Walkway
Use the same radial cutting plane again to build a circular walkway around the Ekko Pavilion. Offset the plane both ways to create two curves for the walkway edges.
Loft these curves to create the walkway surface then give it some thickness too.

Ekko Pavilion: Conclusion
And that’s it! You now have a Grasshopper definition to recreate the iconic Ekko Pavilion from scratch. This project teaches key techniques like manipulating geometry, calculations, cutting, and more.
Take these skills and apply them to your own unique Grasshopper models!
Let me know if you have any questions, and subscribe for more Grasshopper tutorials.
Grasshopper Complete Course
Give your architectural skills a boost with the Grasshopper Complete Course. Get over 50 hours of comprehensive Grasshopper training tailored for architects. Learn to generate and iterate designs faster. Click below for more information and streamline your workflows!