CAD drawings provide a great starting point for 3D modeling a house in Rhino. By leveraging existing 2D drawings, you can quickly build up the basic geometry and forms of a home. In this post, we'll walk through a tutorial on modeling a house from CAD drawings in Rhino.
Importing the CAD Drawings
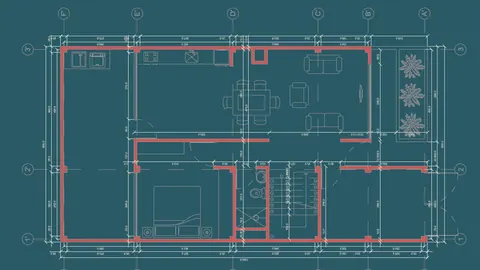
The first step is bringing the 2D CAD drawings into Rhino. This can be easily done by dragging and dropping the DWG files directly into the Rhino viewport.
Once imported, the drawings will appear as a combination of blocks, curves, hatches, and other objects. Take note of areas with hatch patterns, as these can be helpful for identifying walls, floors, etc.
To start modeling the walls, you'll want to join and close any open curve loops. The Join and Close Curve commands are great for this. You can then extract surfaces from closed curves and give them thickness by extruding them.
Any hatched areas can also be extracted into surfaces. Simply select the hatches, explode them into curves, join the curves, and then extrude them into 3D surfaces.

Modeling the Walls and Structures
With the key lines and surfaces extracted, you can start extruding walls and structures. Using surface extrusions rather than dozens of separate curve extrusions helps minimize seams in the model.
Carefully model out all exterior and interior walls based on the CAD drawings. You can leverage model origins and geometric references to efficiently copy and align elements like windows and doors. Any gaps or seams can be patched up later using Boolean union operations.
For interior walls, you'll follow the same process - turn 2D curves into closed polysurfaces, extrude out walls, copy over windows and doors, etc. Don't be afraid to reuse and tweak existing geometries.

Adding Details like Doors, Railings, Roofs
Once the core structure is modeled, it's time to add details like doors, railings, stairs, and roofs. The plans likely include DWG blocks for the window and door styles that you can leverage. Copy these into Rhino and incorporate them into cuts in the solid walls.
Other flourishes like trim can be modeled by sweeping cross-section curves along borders and edges. This enables adding depth and realism quickly.
Roofs can be created by offsetting and expanding existing floor surfaces. Overhangs are easy to model by duplicating and extending edges. There are many techniques for structurally sound and visually appealing roofs.

House from CAD Drawings: Final Touches
Use Boolean operations to fuse all geometry into a continuous, closed polysurface model. This will remove any lingering gaps and seams in the design.
At this point, you have a fully enclosed 3D architectural model built up from imported 2D CAD drawings. With a clean model of the house created from CAD drawings, you can start adding materials, lighting, furniture, and other details to complete the house scene for presentation and rendering.

Conclusion
The ability to bring CAD drawings into Rhino grants huge time savings compared to modeling from scratch. Leveraging existing drafting work as a starting point enables fast and efficient 3D modeling of buildings from CAD drawings. Give it a try on your next architectural visualization project!

Rhino for Architects Course
Give your architectural skillset a major boost with the Rhino for Architects Course. Get over 60 hours of focused training tailored specifically for architects. Master commands and techniques to model, render, and animate architectural visualizations at the highest level. Click below for more information and watch your designs come alive!