The historic Borgloon Church located in Belgium is an architectural marvel known for its intricate stonework and unique layered design. In this tutorial, we'll walk through the process of modeling the Borgloon Church in Rhino step-by-step.
Overview
Modeling the Borgloon Church in Rhino requires some precision and planning. We'll start by importing a reference image so that we can model the overall shape.
Next, we'll use the Contour tool to extract curve lines from the main structure. These curves will drive the rest of the model.
We'll bring the curves into Grasshopper and distribute points along them randomly using the Populate 2D component. Then we'll project the points onto the curves to generate our vertical support structures.
Finally, we'll use a Sweep command to create the rectangular piping shapes with caps on the ends. The result will be a detailed model of the intricate stonework and design.
Step-by-Step Tutorial for Modeling the Borgloon Church
Let's go through each step of modeling the Borgloon Church in more detail:
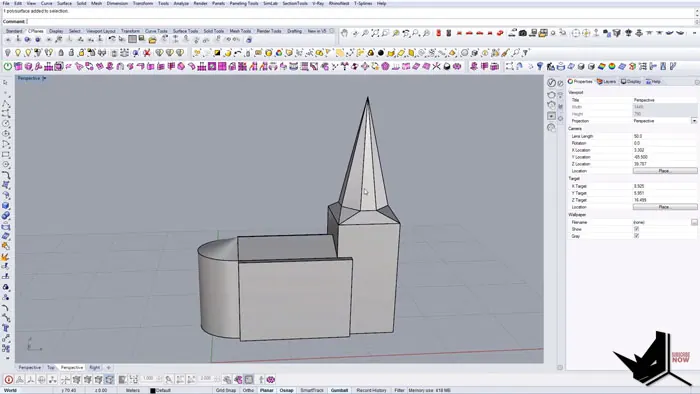
Import Reference Image
First, import a reference image of the Church into Rhino so you can see what you're modeling. Set it to a realistic scale and turn on transparency so the image is faint.
Quickly create the overall shape of the church using extrusion and Boolean tools. The goal here is to just get the main form - no need for perfection.
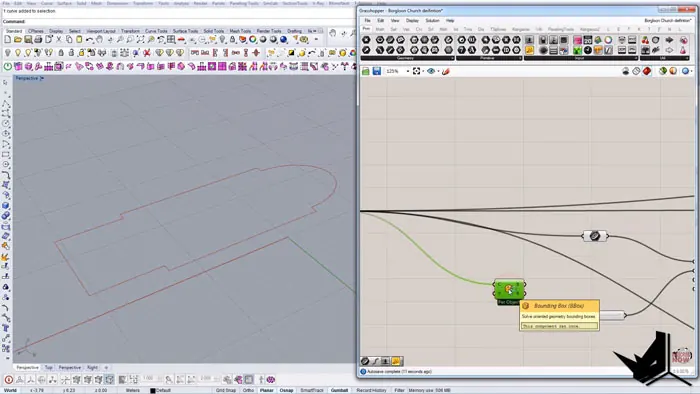
Extract Contours
Once you have the basic shape, extract contours from it using the Contour tool. Set the distance between contours fairly small, around 0.2 units.
This will give you a series of curves representing slices through the model. Delete the original model so just the contour curves remain.
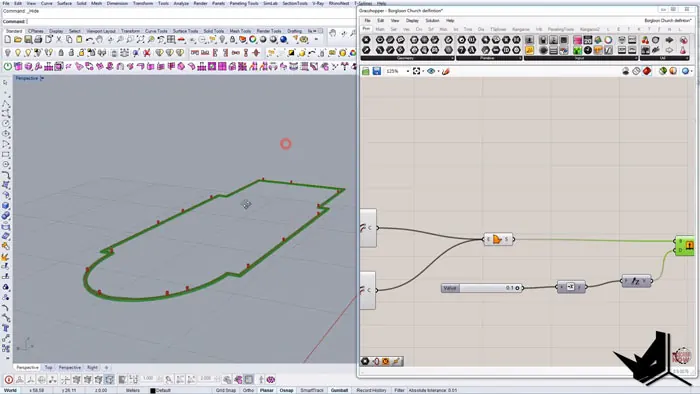
Distribute Points in Grasshopper
Bring the contour curves into Grasshopper. Use a Bounding Box to create a region for the curves.
Apply the Populate 2D component and plug the curves into the B box input. This will randomly distribute points within the region.
Use the Curve Closest Point component to snap the random points onto the contour curves.
Create Vertical Supports
To turn the points into vertical supports, move them up slightly to create two points. Connect the points to make lines using the Line component.
Use a Sweep command to turn the lines into rectangular pipes - this will create the vertical stone supports. Adjust the rectangle dimensions as needed.
Refine the Model
To add thickness to the curves, offset them inward and outward. Use the offsets to create surfaces with the Boundary Surface component.
Extrude the surfaces to create some depth - this will make the curves 3D. Bring everything together in Rhino for the finished model.
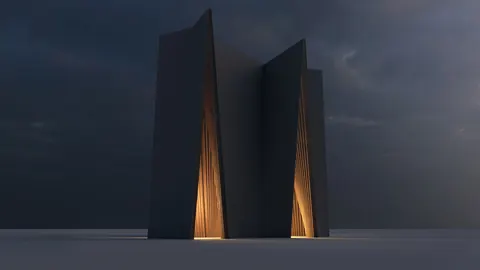
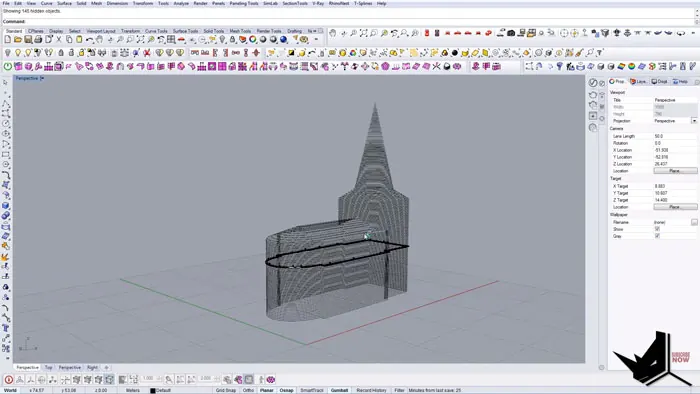
Final Rendered Model
Following this step-by-step process for modeling the Borgloon Church, you can model the intricate details and stonework of the Borgloon Church in Rhino. The end result is an accurate 3D model featuring the layered exterior for which it is famous.
With the power of Grasshopper generative modeling, we can quickly create the many vertical supports and sweeping contours. This would be extremely time-consuming to model by hand, but the Grasshopper definition automates the process of modeling the Church.
Final Thoughts
The final rendered view shows off the church's signature design and stonework. Modeling procedural architecture like this in Rhino demonstrates the software's capabilities for complex organic models.
Be sure to experiment with tweaking the Grasshopper definition to generate variations when modeling the Borgloon Church!

Rhino for Architects Course
Give your architectural skillset a major boost with the Rhino for Architects Course. Get over 60 hours of focused training tailored specifically for architects. Master commands and techniques to model, render, and animate architectural visualizations at the highest level. Click below for more information and watch your designs come alive!