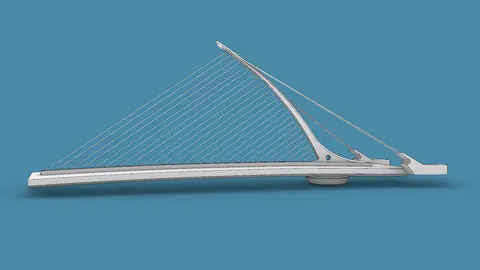
The Cirkelbroen Bridge located in Copenhagen is an architectural marvel known for its circular design spanning across a canal. Designed by the Olafur Eliasson Studio, this iconic pedestrian and cyclist bridge resembles interlinked rings. In this tutorial, we will explore the process of modeling the Cirkelbroen Bridge in Rhino.
Overview of Cirkelbroen Bridge
The Cirkelbroen or Circle Bridge was completed in 2015 in Copenhagen, Denmark. Its circular structure stands out along the harbor, creating an eye-catching sight.
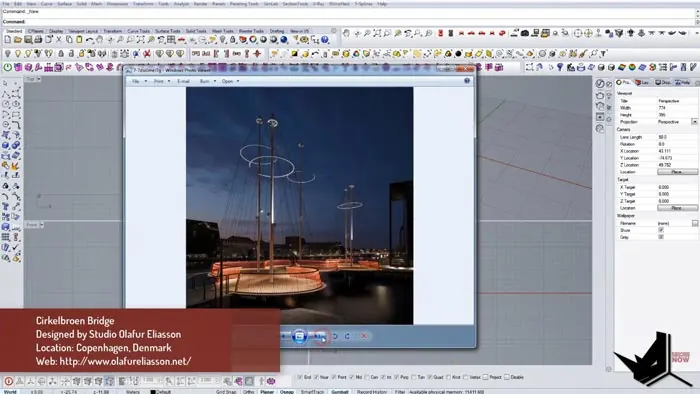
The bridge was designed by renowned Icelandic-Danish artist Olafur Eliasson and his studio. The concept involves five circular platforms linked together to form an S-shaped path across the water.
The bridge has become a famous landmark and tourist attraction in Copenhagen due to its distinctive circular elements. The unique shape presented challenges in terms of structural engineering and construction.
Modeling Cirkelbroen Bridge Base
To start modeling the Cirkelbroen Bridge in Rhino, we'll begin with the base platform.
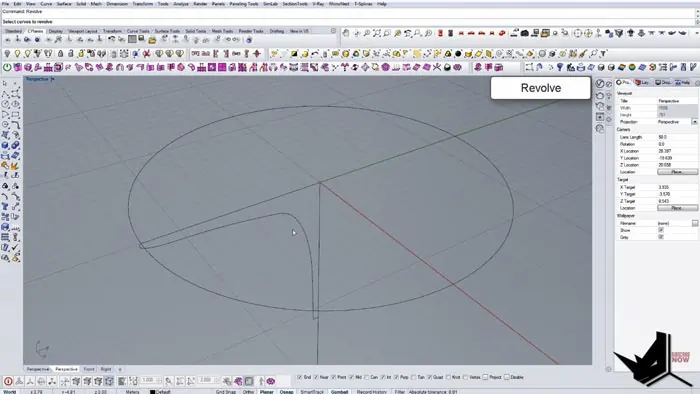
First, draw a circle using the Circle command to form the foundation. Snap the circle to the origin point to centralize it.
Looking at reference images, we can see the base has a curved profile. Draw a curve from the edge of the circle to shape the profile. Adjust and refine the curve to match the smooth shape of the real bridge.
We can embellish the top of the platform by copying and scaling a circle. Use the Pipe command to create thickness.
Once the base platform shape looks accurate, we can use the Revolve command to form the 3D geometry.
Adding the Central Support Pillar
Next, we need to model the tall support pillar at the center of the structure.
Start by drawing a circle in the middle of the platform and extending it vertically based on approximate proportions from reference images.
Copy the circle and scale it down to add a recess detail in the pillar. Use the Pipe command to give thickness to the pillar.
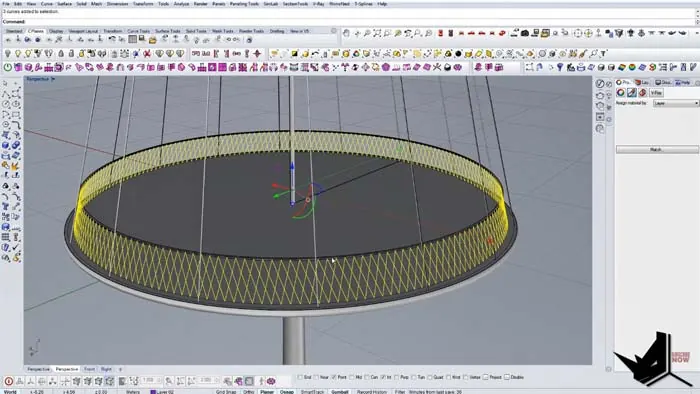
Creating the Circular Railing
The distinctive ringed railings are an iconic part of the Cirkelbroen Bridge's design.
To model the railings, we'll use a Grasshopper definition to distribute curve points and connect them.
First, copy and scale the original base circle to create the railing path. Stretch it vertically to give an angled profile.
In Grasshopper, divide both the top and bottom circles into equal points using the Divide Curve component.
Then use a List Item component to connect every second point between the circles. This will create a curved railing profile.
Finally, join the curves and bake the results into Rhino.

Adding Finishing Details
To complete the modeling of the Cirkelbroen Bridge, add thickness to the railing with the Pipe command. Copy over the steel cable curves from the base.
The Grasshopper definition allows us to easily tweak the curve points to perfectly match reference images.
Small details like chamfering edges can be added for extra realism. Create supporting poles underneath the structure.
Conclusion
Modeling Cirkelbroen Bridge in Rhino involved using circle curves, Grasshopper for precision, and commands like Revolve and Pipe.
The circular pedestrian bridge is an example of Rhino's versatility in recreating beautiful freeform architecture. Let me know in the comments if you have any other suggestions for architecture tutorials!

Rhino for Architects Course
Give your architectural skillset a major boost with the Rhino for Architects Course. Get over 60 hours of focused training tailored specifically for architects. Master commands and techniques to model, render, and animate architectural visualizations at the highest level. Click below for more information and watch your designs come alive!