Rhino 3D is a powerful NURBS modeling software used by designers and architects worldwide. With its accurate modeling and rendering capabilities, Rhino allows the creation of complex freeform shapes, so in this tutorial, we will be modeling a curvy lounge chair.
Overview
In this tutorial, we will learn how to model a modern lounge chair with smooth curves and a sleek design. We will use Rhino's tools like T-Splines and curves to create the basic shape. Then apply materials and render it with realistic shadows and reflections.
The steps include:
- Set up reference images
- Model one side of the chair using T-splines
- Mirror to complete the model
- Extract surfaces and split them for materials
- Add materials and render
Modeling the Chair Shape
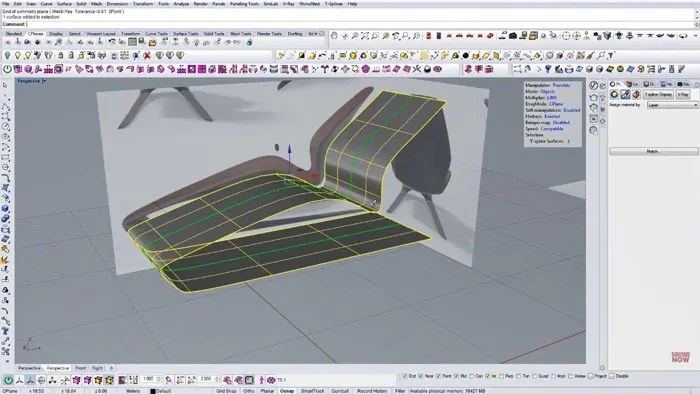
We begin by importing reference images to guide the modeling process. The side and top view images provide the overall shape and angles of the lounge chair design.
Next, we create a T-Spline plane to build the base geometry. Working in the side view, we extrude spline points and pull CV points to match the reference image. We refine the edges by adding more points for sharp angles.
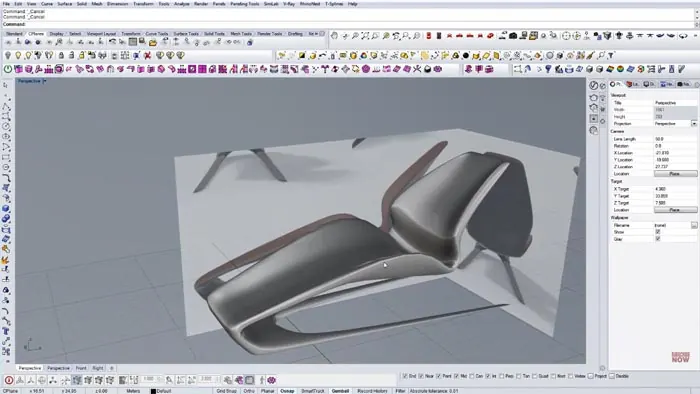
Once we have one side completed, we apply the Mirror tool to duplicate and complete the model symmetrically. The Mirror tool automatically updates both sides as we edit the original.
Preparing Geometry for Materials
To assign different materials to the inner and outer surfaces, we first need to separate them. We use the Extract Surfaces tool to isolate all surfaces into one polysurface.
Next, we split the polysurface along its U and V parameter directions using the Extract Isocurves tool. This divides the model into surface patches that we can select separately.
We join the inner surfaces that will get the fabric material and delete the rest. Now we have clean segmentation between the inner and outer surfaces.
Adding Materials and Rendering
With the lounge chair model ready, we can start assigning materials. A soft fabric like linen works well for the inner surfaces. For the exterior, a lacquered wood finish looks modern and sleek.
Using Rhino's built-in renderer, we add environmental lighting and adjust the materials. Ray-traced reflections and shadows give the rendered chair a realistic look.
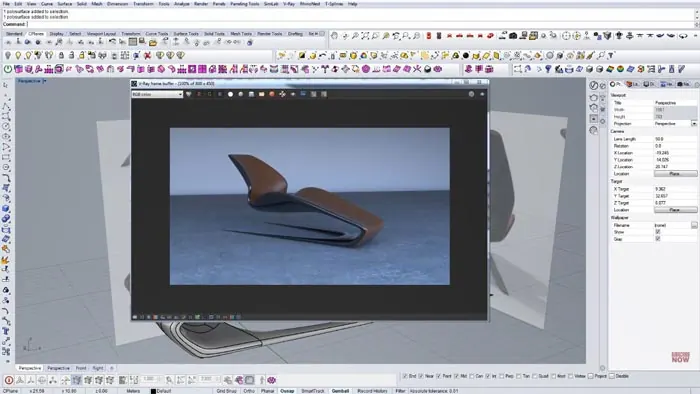
The final result is a beautifully designed lounge chair model ready for use in your project renderings.
Recap and Conclusion
Modeling the Lounge Chair in Rhino demonstrates using T-Splines and references to create smooth organic shapes. We prepared the model for rendering by extracting and splitting surfaces. Finally, adding placeholder materials and lighting pulls everything together in a realistic render.
As you can see, Rhino provides all the tools needed for accurate freeform modeling, materials, and rendering. With some practice, you can design and visualize any kind of furniture efficiently!

Rhino for Architects Course
Give your architectural skillset a major boost with the Rhino for Architects Course. Get over 60 hours of focused training tailored specifically for architects. Master commands and techniques to model, render, and animate architectural visualizations at the highest level. Click below for more information and watch your designs come alive!