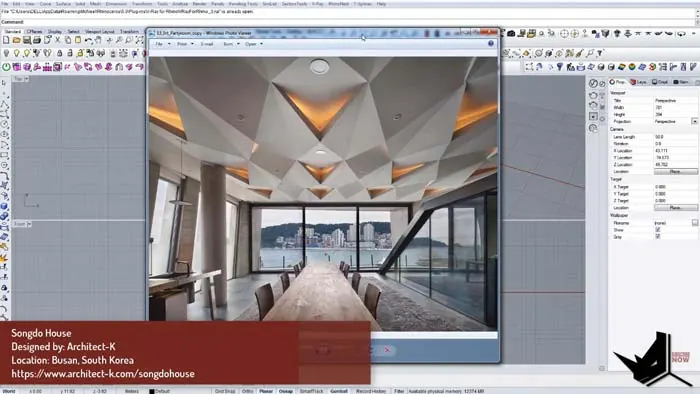
Modular ceilings are a popular design feature in modern architecture. They create visual interest and depth through repetitive geometric patterns. In this tutorial, we will discover the art of modeling modular ceiling in Rhino.
Overview
The goal is to create a parametric ceiling module that can be arrayed to cover a ceiling surface. The module consists of an undulating surface with edges extruded upward.
We will use Rhino's powerful tools like blocks, booleans, and solid editing to model the modular pieces. The end result will be a flexible ceiling system that can be easily edited and adapted.
Create Reference Geometry
First, draw a rectangular reference plane for the module size. For example, make it 1.2 x 2.4 units.
Then add construction lines to lay out the module edges. Mirror and rotate the lines to create the zigzag profile.
Create the Module Profile
Use Curve Boolean tools to convert the lines into closed planar curves. This will define the shape.
Delete any extra lines and curves. You should have a zigzag profile made of closed curves.

Extrude the Profile
Use Surface > PlanarSrf to turn the profile into a surface.
Next, rotate the surface on an axis to get the angled, undulating shape. Move it into position.
Add Thickness
Select the edges and use DuplicateEdge to copy them upward. Offset and trim to create the thickness.
Finish by capping off the top profile to create a closed polysurface.
Make a Block
To make the module parametric, define it as a block. This allows us to edit one instance and update all other copies.
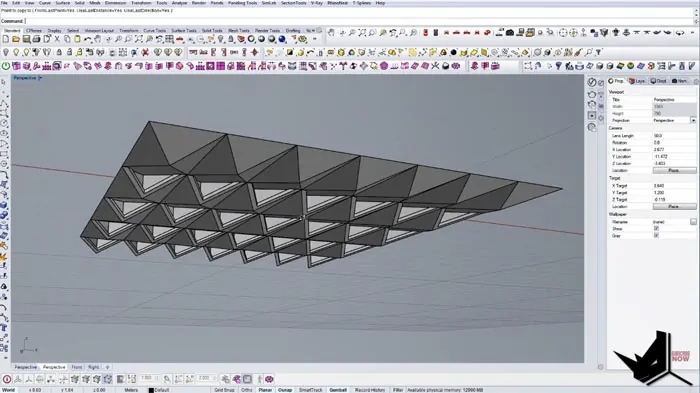
Test by copying the module and arranging it into a grid. Make sure the edges join cleanly.

Refine the Module
If there are gaps in the grid, edit the original module block. Geometry changes will be updated everywhere.
For example, adjust the edge height so modules fit together properly.
Complete the Ceiling
Finish by adding trim surfaces around the perimeter to close off the ceiling.
Copy and array additional modules until the ceiling is filled.
Add Lighting (Optional)
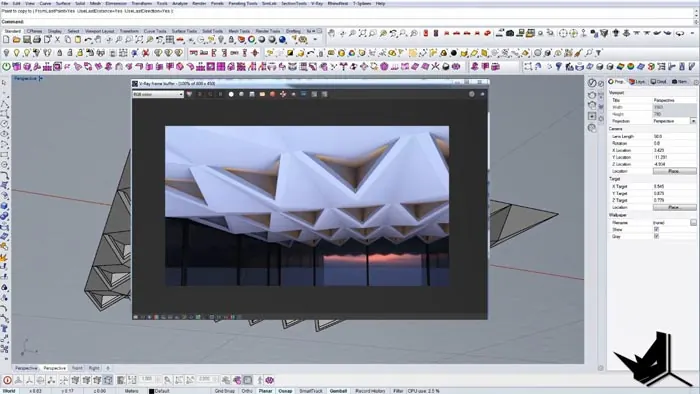
To complete the ceiling, add recessed lighting fixtures. Position them logically to highlight the geometry.
The final step is to render the ceiling with lighting and materials.
Conclusion
The ability to model parametric modules is a powerful tool for furniture, architecture, and product design. This demonstration of modeling a modular ceiling shows how components made with Rhino's blocks can be flexible and easily editable.
Some key takeaways:
With these techniques, there are limitless possibilities for engineering functional modules. The skills apply to many fields like industrial design, jewelry, and even 3D printing.
- Use booleans, solids, and edge modeling to create complex geometry
- Make components into blocks to reuse and update them
- Refine blocks until the modules fit together cleanly
- Array blocks into grids to efficiently model large systems
With these techniques, there are limitless possibilities for engineering functional modules. The skills apply to many fields like industrial design, jewelry, and even 3D printing.
Modeling a parametric ceiling like this is a great way to practice modular modeling in Rhino. Try it out!

Rhino for Architects Course
Give your architectural skillset a major boost with the Rhino for Architects Course. Get over 60 hours of focused training tailored specifically for architects. Master commands and techniques to model, render, and animate architectural visualizations at the highest level. Click below for more information and watch your designs come alive!