With its vast toolset, Rhino makes creating complex 3D models like a reception desk easy and intuitive. In this blog post, we will walk through a step-by-step process of modeling a reception desk in Rhino.
Overview
The goal is to model a modern reception desk with a curved front and an open middle section. We will use Rhino's surface modeling tools like extrude, trim, and boolean operations.
The modeling process can be broken down into a few key steps:
- Model the overall outer shell
- Create the inner curved edges
- Split and remove the inner section
- Add final touches
Properly following these steps will result in a clean 3D model of a desk that is ready for rendering and documentation.
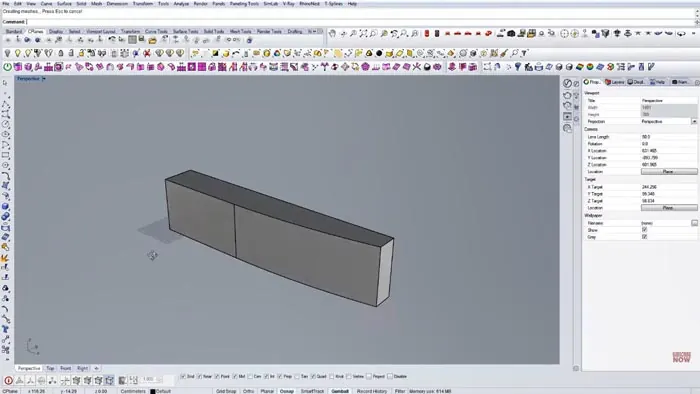
Modeling the Reception Desk: Outer Shell
First, we need to model the overall outer shape.
- Draw a rectangle 500 units wide by 70 units deep. This forms the top.
- Draw an arc at one end using the "Circle Tangent to 3 Curves" command. Trim the excess lines.
- Extrude the 2D outline to give it thickness. A height of 115 units is used.
This creates the basic solid shape for the top of the desk.
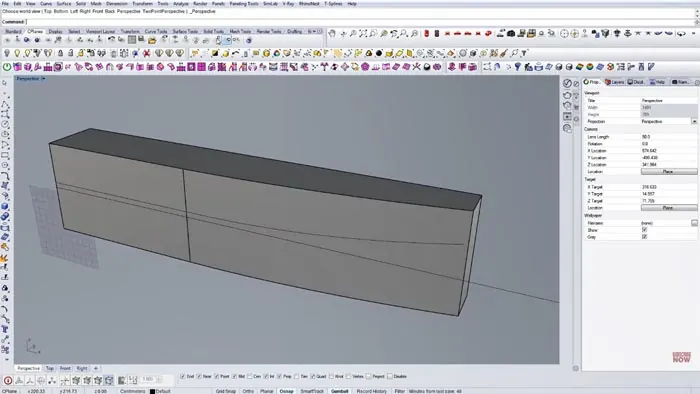
Creating the Inner Curves
Next, we need to draw the curved inner edges that will be used to cut out the center opening.
In the side view, draw two curved lines approximating the inner shape. Use control points to align the endpoints so the lines join properly. In order for the boolean operations to work properly, we extend the lines slightly beyond the edges.
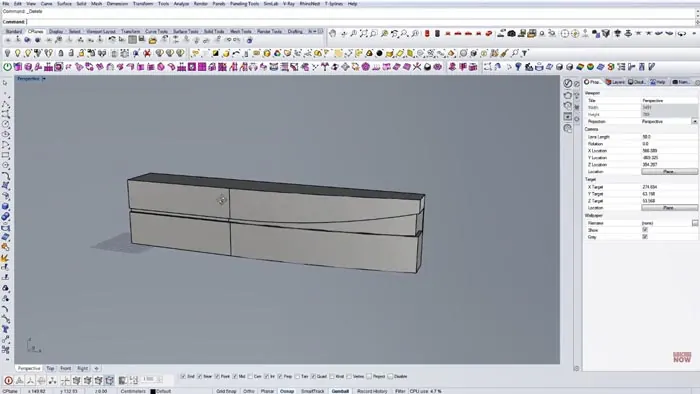
Splitting and Removing the Inner Section
Now we are ready to cut out the center opening using the inner curves. To achieve this, extrude both curves into 3D surfaces going through the thickness.
We do a boolean split using these surfaces to cut the opening. Next, delete the extra surfaces as they are no longer needed and move the inner section inwards slightly so there is a lip.
This creates the hollowed-out middle section as needed for the final model.
Final Touches
To polish up the 3D model, there are some final steps:
- Trim away any excess surfaces in the backside.
- Extrude the bottom edge down to create thickness.
- Apply any edge softening or beveling to smooth the look.
Once these last refinements are made, the model is complete!
The finished model can now be rendered and used for design visualizations and documentation.
Conclusion
Following this step-by-step process shows how powerful Rhino's tools are for modeling even complex shapes like a reception desk. The key is breaking it down into distinct steps:
- Creating the overall outer surface
- Drawing inner edges to cut openings
- Performing boolean operations to split surfaces
- Refining the final model
With some practice, modeling a reception desk like this becomes quick and easy in Rhino. The end result is a lightweight 3D model that looks great when rendered and can be used downstream in your design projects.

Rhino for Architects Course
Give your architectural skillset a major boost with the Rhino for Architects Course. Get over 60 hours of focused training tailored specifically for architects. Master commands and techniques to model, render, and animate architectural visualizations at the highest level. Click below for more information and watch your designs come alive!