The Lisbon Pavilion designed by renowned Portuguese architect Alvaro Siza is an iconic structure located along the Tagus River. Built for the 1998 Expo, this open-air pavilion is a must-see for architecture enthusiasts visiting Portugal's capital. In this tutorial, we'll look at how to go about modeling Lisbon Pavilion by Siza in Rhino step-by-step.
Overview of the Lisbon Pavilion's Unique Design
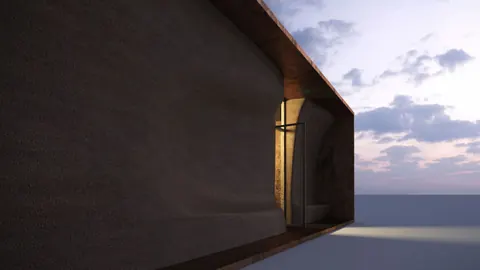
The Lisbon Pavilion consists of two elongated canopy structures placed parallel to each other. Slim columns support the canopies, with two sections connected by a curved roof. One of the most striking elements is the structurally expressive curves and organic shapes used throughout.

The pavilion was designed by Siza specifically for the Expo site along the riverfront. Its placement and openness connect it to the surroundings while still providing shade and enclosure. The creative use of smooth lines and twisting forms highlight Siza's signature style.
Step-by-Step Process for Modeling Siza Pavilion in Rhino
To accurately model Siza's Lisbon Pavilion in Rhino, we'll need to carefully recreate the sizes, proportions, and angles that Siza used. Here is an overview of the step-by-step process for modeling Siza Pavilion:
- Set up reference lines for the main canopy segments using the precise length and width measurements.
- Add vertical axes for the slim column supports and draw the columns using polylines.
- Extrude the columns to the full height of 13.9m and add the beams at the top.
- Create the side wall panels under the canopies, using surface modeling tools.

- Add in the door and window openings by subtracting them from the wall surfaces.
- Model the curved canopy roof that connects the two main sections.
- Create the metal cable wires that crisscross under the roof canopy.
- Use pipes and cylinders to add refined details and finalize the model of the Siza Pavilion.
And there it is!

Tips for Efficient and Accurate Modeling of Siza Pavilion
When taking on modeling such a complex architectural structure like Siza's Lisbon Pavilion in Rhino, it helps to break things down into simple steps first. Here are some tips to keep in mind:
- Use precise reference measurements for all elements to match the real-world dimensions of Siza Pavilion.
- Build up the model piece by piece starting from the ground plane up, as if constructing Siza Pavilion.
- Pay attention to the order of operations - make sure to join objects before subtracting or intersecting.
- Use reference geometry lines to position elements exactly where needed to mimic Siza Pavilion.
- Mirror and array objects to quickly duplicate symmetrical or repeating elements seen in Siza Pavilion.
- Refine forms with pipes, cylinders, and surface tools for more realism just like Siza Pavilion.
Conclusion
Siza's Lisbon Pavilion is an incredible example of free-flowing forms made tangible. With its twisting shapes and lattice-work details, modeling Siza Pavilion may seem intimidating at first. But by following the step-by-step process outlined here, you can accurately recreate this iconic architectural design in Rhino. The end result will be a virtual model that captures the essence of Siza's organic style and the beauty of his Lisbon Pavilion.

Rhino for Architects Course
Give your architectural skillset a major boost with the Rhino for Architects Course. Get over 60 hours of focused training tailored specifically for architects. Master commands and techniques to model, render, and animate architectural visualizations at the highest level. Click below for more information and watch your designs come alive!