Modeling interior design elements like twisted shelves in 3D modeling software can seem intimidating. But with the right techniques, it's easier than you think! In this tutorial, we'll walk through the process of modeling twisted shelves in Rhino step-by-step.
Overview
Twisted or spiral shelves are an interesting design element that can add visual interest to any interior space. The key to modeling them in Rhino is using the Twist command.
This allows you to take a flat surface and twist it around an axis at an angle you define. When you copy and join several twisted surfaces together, you can create shelves with a dynamic spiraling shape.
In this tutorial, we'll look at:
- Drawing the shelf profiles
- Using reference points and Twist to create the spirals
- Joining and copying the twisted surfaces
- Adding thickness and creating the wall mounts
- Finishing touches like boolean operations
The great thing about this technique is that it's easy to customize and experiment with different spiral shapes and angles. So let's get started modeling some twisted shelves in Rhino!
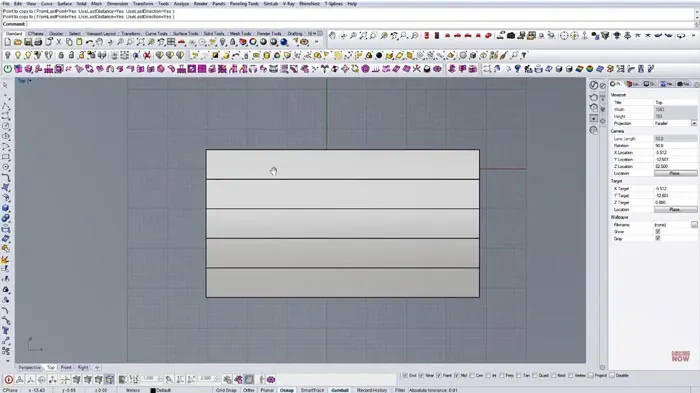
Step 1: Draw Shelf Profiles
First, we need to draw the profile curves that will form the flat surface of each shelf. Start in the Top view in Rhino and draw a simple rectangle - this will be the shelf's flat profile before twisting. Delete the rectangle and turn the lines into a Planar Surface. Then, delete the lines so just the surface remains.
This surface will become our first shelf. We'll make 5 shelves in total.
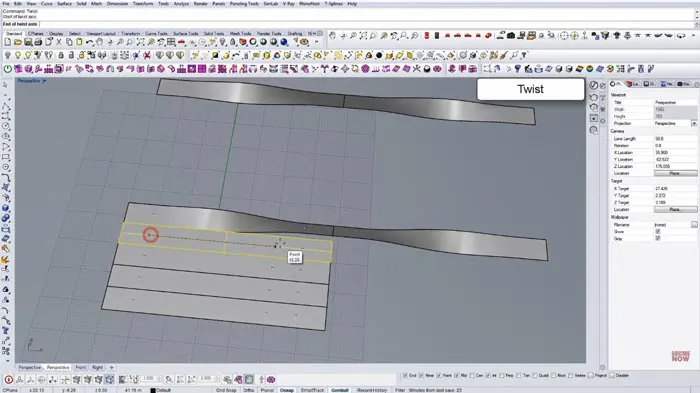
Step 2: Add Reference Points
Now let's add some reference points that we'll use for the spiraling. To do this, draw diagonal reference lines across the surface. Add reference points at the intersections.
These points will define the axis and angle of the twist.
Step 3: Use Twist Command
Here is where the magic happens - using the Twist command.
Select two reference points to define the start and end points of the twisting axis. Enter 90 as the angle to twist through. With this, the surface will twist between the two points through 90 degrees.
Experiment with different reference points and angles to get different spiral shapes.
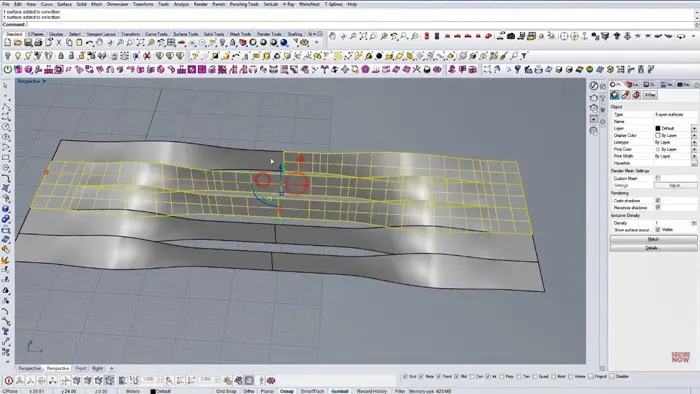
Step 4: Copy and Join Shelves
Copy the twisted surface to create all the shelf pieces. After this, rotate and move them into position. We will then join them in order to create a single polysurface.
Step 5: Add Thickness
To turn the 2D surfaces into 3D shelves, we need to give them some thickness. Use the Offset Surface command to create an offset version of each shelf surface. Delete the original and keep the offset.
Repeat this for all shelves to give them 3D thickness
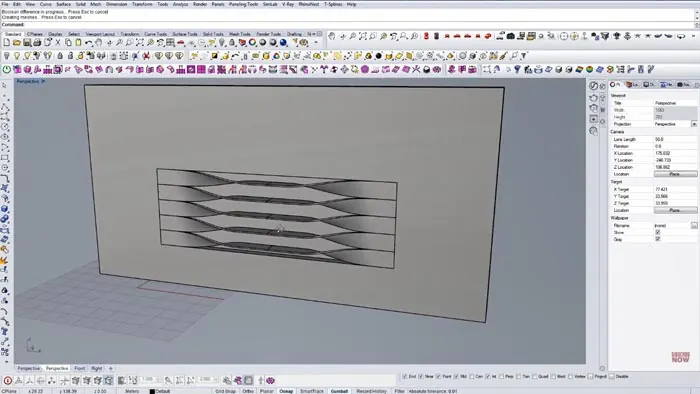
Step 6: Create Wall and Mounts
To finish off the shelves, draw a vertical surface to represent the wall. Move the shelves into position on the wall and then use Boolean operations to cut holes in the wall for mounting the shelves.
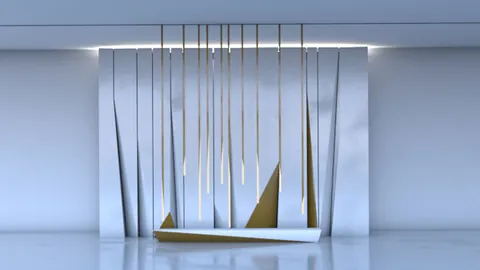
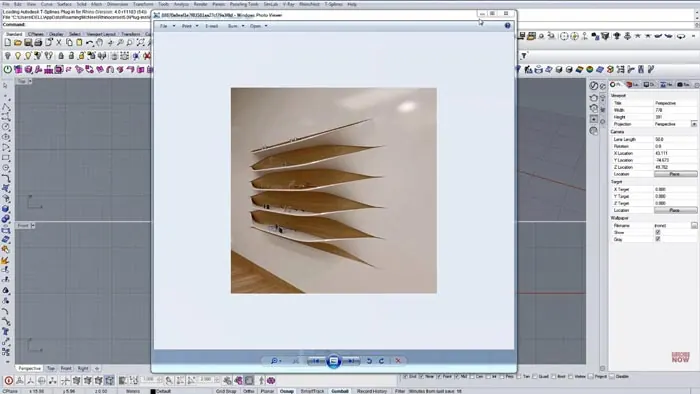
Final Result
The end result is a set of cool spiral shelves mounted on the wall!
Customizing Your Twisted Shelves
The great thing about this technique is how easy it is to customize the spiraling shapes.
- Try different reference points and twist angles
- Adjust the spacing and overlaps of the shelves
- Experiment with different shelf sizes and proportions
So that's it - a step-by-step guide on modeling twisted shelves in Rhino. The Twist command makes it easy to create these kinds of spiraling shapes.
Just take it shelf by shelf, and before you know it, you'll have created some awesome 3D geometry!

Rhino for Architects Course
Give your architectural skillset a major boost with the Rhino for Architects Course. Get over 60 hours of focused training tailored specifically for architects. Master commands and techniques to model, render, and animate architectural visualizations at the highest level. Click below for more information and watch your designs come alive!