When designing a building's facade, architects often want to create surfaces that appear to bend and curve like wind blowing across the structure. This can create a dynamic look and help the building stand out. In this tutorial, we'll look at how to go about modeling a wind facade in Rhino using some helpful techniques.
Overview of Modeling Wind Facade
To create the winding, curvy effect on the facade when modeling a wind facade, we'll use Rhino's surface division and offset capabilities along with Grasshopper to divide the surface into the patterns we need. The basic steps are:
- Model the basic building shape
- Offset and divide the surface into segments
- Use Grasshopper to divide the segments and create the wind-blown pattern
- Extrude the patterned segments into 3D
- Cut diagonal openings on the bottom for effect
Modeling the Basic Structure
First, we'll model the basic underlying building shape that the wind facade will attach to. We've created a simple curved wall with an overhanging top.
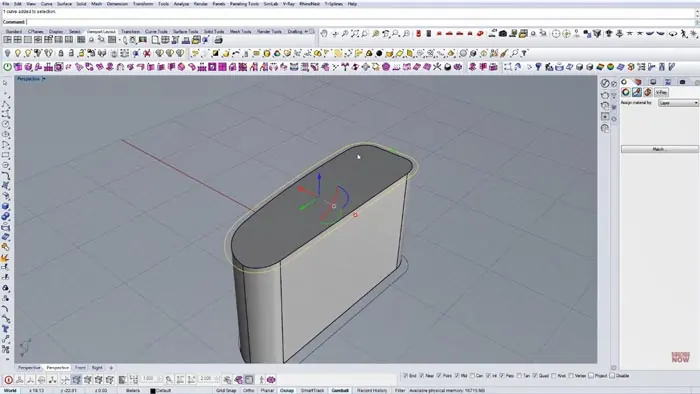
The proportions don't have to be exact yet - we're just getting the overall form built.
Offsetting and Dividing the Surface
Next, we'll select the top surface and offset it inward slightly. This offset surface will become the wind facade we pattern.
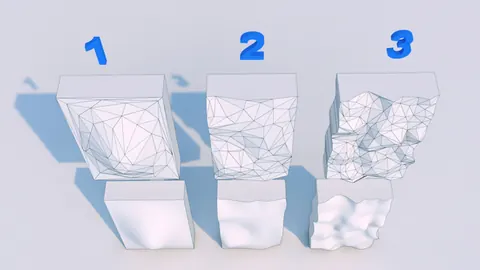
We'll convert the offset curve edges to splines so they can be smoothly divided. Then, we can add surface divisions to split the facade into horizontal segments.
The more segments we add, the more detailed the wind-blown effect will be when modeling the wind facade.

Using Grasshopper to Create the Pattern
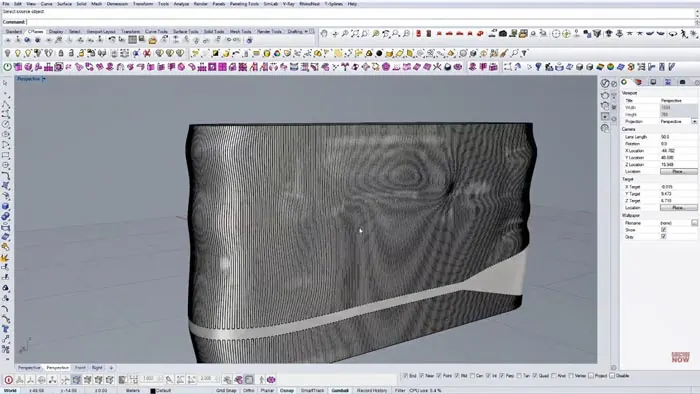
Now we'll bring the divided surface into Grasshopper to apply a wind-like pattern to the facade.
Grasshopper has a command called "Isotrim" that will divide a surface into a grid. We can control how many divisions are in each direction - this lets us turn the flat grid of segments into a waving pattern.
By dividing into small rows and selecting every other row, we create the up-and-down winding look.
Extruding the Pattern
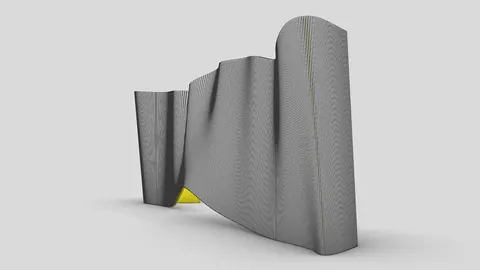
After bringing the patterned surface back into Rhino, we can give it depth by extruding it into a solid. This creates our final wind facade shape based on the wind-blown pattern.

Adding Angled Openings
As a final touch, we can cut diagonal openings on the bottom edges to enhance the wind-blown look when modeling a wind facade. This helps convey motion and direction.
And that's it! With some strategic surface division and Grasshopper pattern manipulation, we can create a facade that mimics the flowing, wavy effect of wind. This type of modeling lets architects experiment with dynamic building shapes, so try it out for yourself!

Rhino for Architects Course
Give your architectural skillset a major boost with the Rhino for Architects Course. Get over 60 hours of focused training tailored specifically for architects. Master commands and techniques to model, render, and animate architectural visualizations at the highest level. Click below for more information and watch your designs come alive!