Living in the mountains provides stunning views and a connection with nature. However, building a home to take full advantage of the surroundings takes careful planning and design. In this tutorial, we’ll walk through a modern mountain house design in Rhino step-by-step.
Overview of the Mountain House Design Process
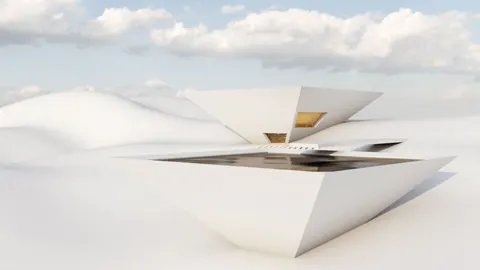
Our mountain house design is inspired by a conceptual project from Iranian architect Reza Mohtashami.

To start, we’ll import reference images into Rhino so we can set up accurate proportions as we model.
Next, we’ll use lines, rectangles, curves, and surfaces to lay out the basic shapes and divisions for the structure, windows, and other features based on the reference images. We’ll divide and mirror elements to quickly fill out the facade.
Once we have the 2D layout, we’ll extrude surfaces and add thickness to create the 3D forms. We’ll model details like the wooden board covers and structural supports. The process involves steps like:
- Trimming and joining curves
- Using commands like Curve Boolean
- Converting curves into surfaces
- Mirroring elements to duplicate shapes
- Using blocks to quickly replicate windows
The final step is adding any remaining structural and decorative details, like support beams and cables.
Laying Out the 2D Structure and Divisions
To start modeling our mountain house in Rhino, we’ll import reference images as a guide. After importing a photo, I lock it and draw over some helper lines to indicate the major proportions and angles.
Some key steps in laying out the 2D structure:
- Use point object snaps and measurements from the reference to plot lines and rectangles for the overall volumes and glass dividers.
- Mirror elements across center axes to quickly replicate shapes.
- Copy rectangular frames and divide them to evenly space the window divisions.
- Trim unnecessary lines to create clean curve outlines for the foundation and roof.
- Join separate curves into closed polylines wherever possible.
Once the 2D profile is mapped out, we can start extruding surfaces and adding thickness.

Modeling the House Forms
With the 2D roadmap set, we start constructing the 3D mountain house model in Rhino by giving the curves and edges some thickness.
Some key techniques used to model the forms:
- Use commands like ExtrudeCurve and PlanarSurface to turn curves into 3D objects.
- Make blocks out of repetitive elements like the windows to quickly replicate them.
- Mirror surfaces to duplicate shapes on opposite sides.
- Boolean operations like splitting to cut holes or grooves into surfaces.
Small details go a long way in making a model feel more real. We add extruded rectangles to create window frames, sills, and cover boards. We use cylinders and booleans to create recesses for cables to run along the roof edges.

Adding Structural Details
The final step in our mountain house design is to add structural elements that would be essential for an actual building.
Some finishing touches:
- Support beams beneath overhanging sections
- Thicker corner pillars for visual support
- Cross beams spreading from the pillars
- A recessed entryway
The streamlined shapes and extensive glass give the home a light, airy feel, while the wood materials and structural elements ground it within the mountain environment.

Takeaways for Rhino Architectural Modeling
Following this step-by-step mountain house modeling example highlights some best practices for approaching architectural projects in Rhino:
- Work from reference images for correct proportions
- Build up from 2D profile curves to 3D surfaces
- Utilize timesaving steps like mirroring and blocks
- Add thickness and structural details
- Focus on how pieces fit together and intersect
With precision tools for creating and manipulating geometry, Rhino provides the flexibility to model anything from tiny details to soaring structures. Start simple by laying out 2D curves, then extrude and shape them into a complete 3D model.
Hope this overview gives you ideas and techniques to apply in your own Rhino architecture projects! Let me know if you have any other topics you’d like to see a tutorial on.

Rhino for Architects Course
Give your architectural skillset a major boost with the Rhino for Architects Course. Get over 60 hours of focused training tailored specifically for architects. Master commands and techniques to model, render, and animate architectural visualizations at the highest level. Click below for more information and watch your designs come alive!