In recent years, architectural software and digital design tools have taken massive strides in development, providing designers with versatile options. One such tool is Grasshopper, a graphical algorithm editor, and its range of plugins. Among these, the "Paneling Tools" have proven immensely useful. This article aims to provide an in-depth look at the Paneling Tools in Grasshopper, breaking down their functionalities, applications, and benefits.
Introduction to Paneling Tools in Grasshopper
Paneling Tools help architects and designers generate 2D and 3D cellular patterns and populate them over rectangular grids, 3D surfaces, or NURBS. Whether you're aiming to create a simple 2D pattern or complex 3D structures, these tools provide a vast array of options.
Getting Started: The Basics
To initiate the paneling process, we can start by setting up a grid. This grid serves as the primary base upon which patterns or geometry can be distributed. Within Grasshopper, there are specific components like "Random Attractor" that assist in randomizing the position of grid points, adding an element of spontaneity and versatility to your designs.

Advanced Paneling: 3D Panel Creation
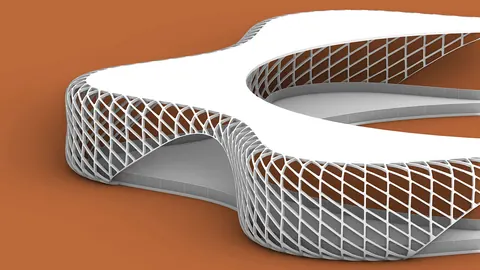
A standout feature of the Paneling Tools in Grasshopper is the ability to create intricate 3D panels. The process involves:
- Setting up a surface domain.
- Generating grid points.
- Extracting center points from each grid cell using the 'center grid' component.
- Moving these points along a specified vector to create 3D effects.
Using the Panel 3D Connections component, designers can then connect these 3D panels, producing fascinating structures like trusses or other complex patterns.

Customized Geometry Distribution
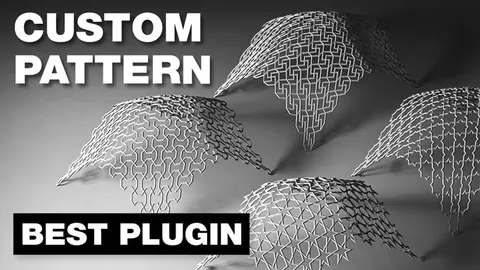
Not limited to just panels, Grasshopper's toolset also allows users to distribute custom geometry across a surface. By connecting the pre-defined geometry to specific input points, one can achieve diverse patterns, giving designers unparalleled freedom to materialize their imagination.
Benefits of Using Paneling Tools in Grasshopper
- Versatility: From basic 2D patterns to intricate 3D structures, these tools cater to a wide array of design needs.
- Efficiency: Instead of manually creating patterns, designers can automate and tweak designs with just a few component adjustments.
- Optimized Workflows: Integration with other tools, like Lunchbox, can enhance the design process, allowing for more diverse outcomes.
Conclusion
The Paneling Tools in Grasshopper have revolutionized the way designers approach patterns and distributions in their projects. By mastering these tools, architects and designers can bring their visions to life with greater ease and precision.
Remember, if you're keen on diving deeper into the topic, there are numerous tutorials available online. For those who are serious about taking their design skills to the next level, understanding and mastering the Paneling Tools in Grasshopper is a journey worth embarking on.
Grasshopper Complete Course
Give your architectural skills a boost with the Grasshopper Complete Course. Get over 50 hours of comprehensive Grasshopper training tailored for architects. Learn to generate and iterate designs faster. Click below for more information and streamline your workflows!