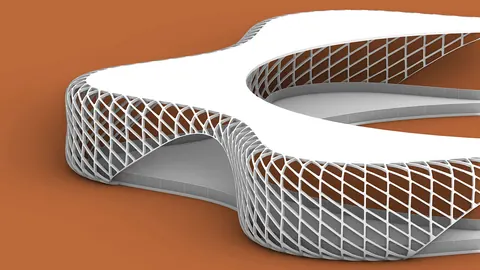
Paneling tools with Grasshopper is an incredibly powerful way to create custom panelizations for your architectural designs. With the techniques covered in this tutorial, you'll be able to master creating panelization patterns of any shape or complexity.
Overview
In the provided tutorial scripts, we walk through a step-by-step process for creating a custom panelization pattern using the paneling tools with Grasshopper plugin.
The key steps we'll cover are:
- Rebuilding the surface with uniform UV spacing
- Creating a grid of points on the surface
- Understanding the grid structure and mapping shapes to it
- Extracting the UV coordinates for each shape's corners
- Generating the pattern in Grasshopper
- Connecting the grid and multiplying it across the surface
Rebuilding the Surface
The first step is to reference the surface you want to panelize in Grasshopper. To ensure uniform spacing, we'll rebuild the surface using more vertices. The more vertices, the better the point distribution will be.
We use the Surface Domain Number component from the paneling tools plugin to create a grid of points. This requires inputs for the number of spans in U and V directions.

Creating the Point Grid
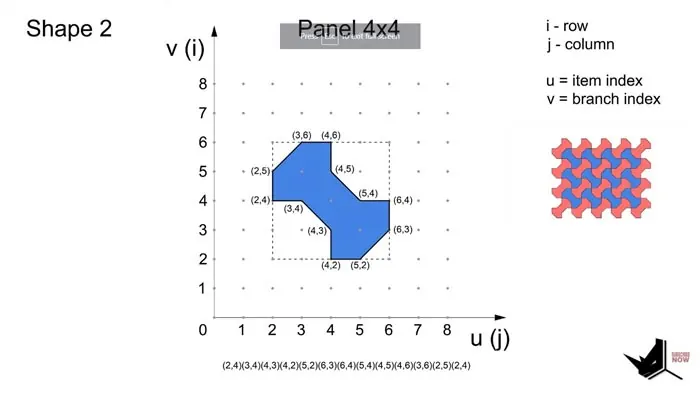
The points along the U direction will have the same branch index, but different item indexes. The points along V will have the same item index but different branch indexes.
The U coordinate represents the item index, while the V coordinate represents the branch index. Understanding this grid structure is key for mapping the panel shapes.
Mapping Shapes to the Grid
Once we grasp the grid logic, we can map each shape to a panel based on its UV coordinates. We'll extract the corner coordinates of each shape and recreate the pattern in Grasshopper.
The same process applies whether we have a simple 4-sided shape, or a more complex custom shape like a star.
Generating the Pattern
With the shape logic understood, we can head back to Grasshopper. We know each panel needs a 4x4 grid, which we multiply across the surface based on the number of panels in U and V.
We connect the grid to Panel Connections, where we input the pattern string defining the shape. This can be typed directly or created from a list of UV coordinates.
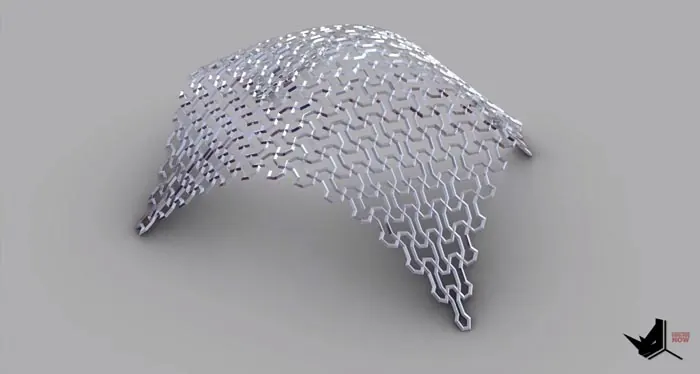
Complete Custom Panelization
Using these steps, you can now create any custom panelization pattern imaginable with Grasshopper's paneling tools. This opens up vast possibilities for unique architectural facades.
The tutorial covers the core concepts so you can apply them to your own designs. With some practice, you'll be panelizing surfaces in no time!
Extended Learning
For those looking to take it further, we've created an advanced tutorial covering:
- More complex custom shapes like stars
- Modifying the initial grid
- Additional examples to practice your skills
On our Patreon, you can access the extended version plus all our other premium tutorials and models.
So if you want to truly master Paneling Tools with Grasshopper, be sure to check it out!
Conclusion
Being able to create custom panelizations is an incredibly valuable architectural skill. With the techniques covered here, you now have the blueprint to start panelizing any surface imaginable.
We've only scratched the surface of the possibilities. So get creative, keep practicing, and most importantly - have fun!
If you found this tutorial helpful, please consider supporting us on Patreon so we can keep creating content. And as always, feel free to ask any questions in the comments below. Happy panelizing!
Grasshopper Complete Course
Give your architectural skills a boost with the Grasshopper Complete Course. Get over 50 hours of comprehensive Grasshopper training tailored for architects. Learn to generate and iterate designs faster. Click below for more information and streamline your workflows!