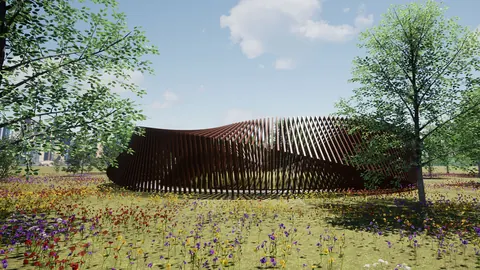
Architectural visualization is a crucial part of the design process. It allows architects to bring their ideas to life and show clients what the finished project will look like. One of the most popular visualization tools is Lumion, which allows you to quickly create realistic renders and animations. However, getting CAD models from Rhino into Lumion can be tricky. In this post, we'll look at how to set up a smooth Rhino Lumion workflow.
Overview of Rhino Lumion Live Sync
Rhino and Lumion offer live syncing between the two programs. This means any changes made in Rhino are automatically updated in Lumion in real time. It's a huge time saver compared to manually exporting and importing files.
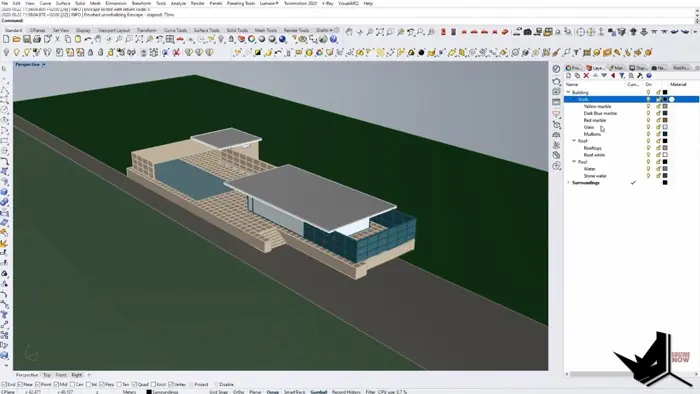
When setting up your Rhino file for Lumion live sync, the most important thing is to organize your layers by material type. Lumion doesn't recognize Rhino's layers, so you need to apply materials in Rhino first. Each material should be on its own layer.
Once materials are set up, you can start Lumion Live Sync to bring your Rhino model into Lumion. The materials will transfer over and be much easier to modify compared to applying materials directly in Lumion.
Step-by-Step Guide to Rhino Lumion Workflow
Follow these steps for a smooth workflow between Rhino and Lumion:
- In Rhino, organize your model into layers based on materials. For example, all walls with the same material should be on one layer. Apply the necessary materials to each layer.
- Open Lumion and start Live Sync. Your Rhino model will be imported with materials intact.
- Make any adjustments to materials in Lumion. You can fine-tune colors, glossiness, and other material properties.
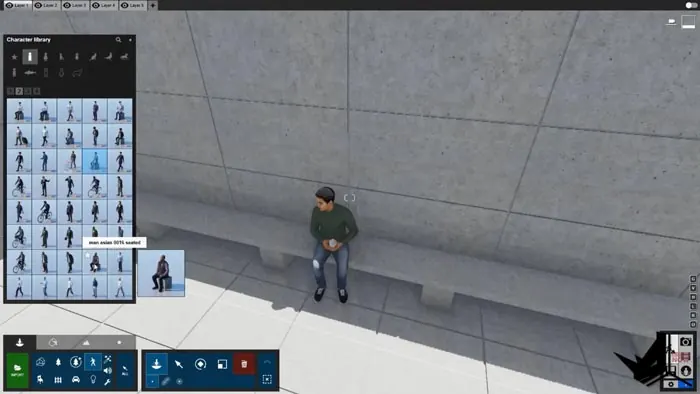
- Use Lumion's library of entourage to populate your scene. Add trees, people, furniture, etc. Changes sync back to Rhino automatically.
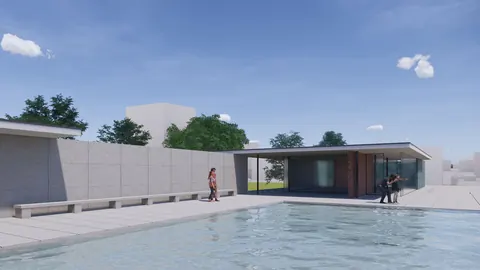
- Adjust lighting and set up your desired shot. Customize the time of day, weather conditions, and camera perspective.
- Export final renders and enjoy! Lumion makes it easy to export still images and video flythroughs.
Following this straightforward Rhino Lumion workflow allows you to leverage the strengths of both programs. Rhino handles the modeling while Lumion brings it to life with speed and realism.
Key Benefits of Rhino Lumion Workflow
Some of the biggest advantages of using Rhino and Lumion together include:
- Live syncing saves tons of time compared to manual exports.
- Organization by material streamlines the workflow and editing.
- High-quality renders in a fraction of the time of other engines.
- User-friendly entourage library for easy scene population.
- Realistic materials like water, glass, metal, etc.
For architecture visualization, Rhino and Lumion are a match made in heaven. The Rhino Lumion workflow ultimately allows designers to turn their ideas into stunning visuals with ease.
Summary
Rhino and Lumion make architectural visualization accessible and intuitive. By setting up your Rhino model with proper material organization and leveraging Lumion's live sync, you can create detailed renders and animations faster than ever before.
The key is understanding how to optimize the hand-off between the two programs. Once you have it configured correctly, the Rhino Lumion workflow will accelerate your design process and let the visuals speak for themselves.

Rhino for Architects Course
Give your architectural skillset a major boost with the Rhino for Architects Course. Get over 60 hours of focused training tailored specifically for architects. Master commands and techniques to model, render, and animate architectural visualizations at the highest level. Click below for more information and watch your designs come alive!