Rendering a beautiful 3D section in Vray for your architectural visualization can really help showcase the intricacies of your design. With the right settings and materials, you can create eye-catching sections that grab attention.
In this post, we'll explore how to create stunning 3D sections in Vray for Rhino.
Overview of 3D Sections in Vray
Vray's clipping planes make it easy to generate 3D sections. By combining multiple clipping planes with different materials, you can create colorful cuts that slice through your model.
Here's what we'll cover:
- Using clipping planes to create section cuts
- Assigning materials to color the cut planes
- Combining multiple clipping planes for unique effects
- Optimizing sections for rendering
Understanding these key concepts will help you take your Vray sections to the next level.
Using Clipping Planes
The core of 3D section generation in Vray is the clipping plane. This tool lets you slice through geometry to reveal inner areas.
To generate a section, simply create a clipping plane and position it where desired. Rotating the plane adjusts the cut angle.
You'll notice the plane cuts through the viewport display. This represents the sectioning even when the clipping plane itself is hidden.
Activating the "on" setting displays the plane in the viewport. Turn this off for cleaner previews.
The important part is enabling the clipping under Vray's settings. This ensures the cut appears in final renders.
With the basics covered, we can move on to more advanced options.

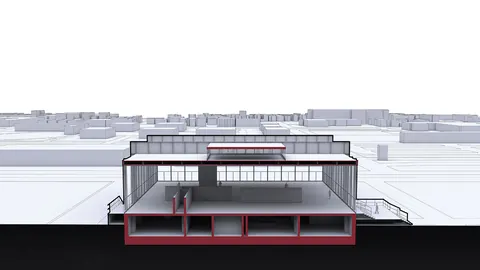
Coloring Section Planes
By default, Vray leaves section cuts white. This helps distinguish the clipped area.However, assigning a material lets you color the cut plane instead. This creates a colorful section edge that blends with surrounding materials.
Simply create a Vray material with the desired section color. Disable "Use Object Material" under the clipping plane properties. Then assign the material to the plane.This will overwrite the default white cut with your custom material. Try different colors for unique effects!

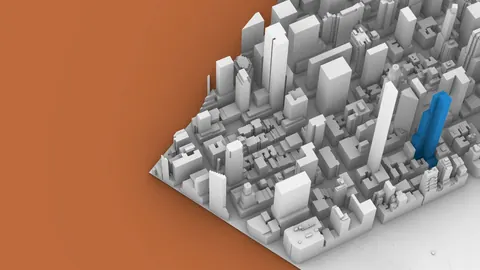
Combining Multiple Section Planes
The real magic happens when you combine several clipping planes at once. By layering colored sections, impressive 3D diagrams are possible.
Start by creating multiple clipping planes positioned as needed. Give each a distinct name and material, like "Section 1 Blue" and "Section 2 Red".
Make sure all planes are enabled under the Vray renderer. The combined result will showcase the different cut directions and colors.
Get creative with the section angles and colors. Complex forms can be broken down easily with strategic cutaways.

Optimizing Sections for Rendering
A few quick tips will take your sections from good to great:
- Adjust plane positions to avoid clipping model edges
- Refine materials so the colored edges blend naturally
- Match section colors to surrounding materials
- Play with light placement to make cuts pop
With practice, you'll be able to generate stunning sections with ease. Analyze real-world examples for inspiration.
Vray 3D Section - Take Your Sections to the Next Level
Rendering eye-catching 3D sections is a breeze with Vray for Rhino. Clipping planes make it simple to reveal inner areas, while custom materials add flair.
For more details on optimizing these cutaways, be sure to watch the full tutorial. The extended version covers material creation, lighting, and more.
With the strategies covered here, you have the foundation to create beautiful sections. Take time to refine the details for maximum impact.
Experiment with colorful sections on your next project. Your visualizations will stand out and effectively showcase your designs.

Rhino for Architects Course
Give your architectural skillset a major boost with the Rhino for Architects Course. Get over 60 hours of focused training tailored specifically for architects. Master commands and techniques to model, render, and animate architectural visualizations at the highest level. Click below for more information and watch your designs come alive!