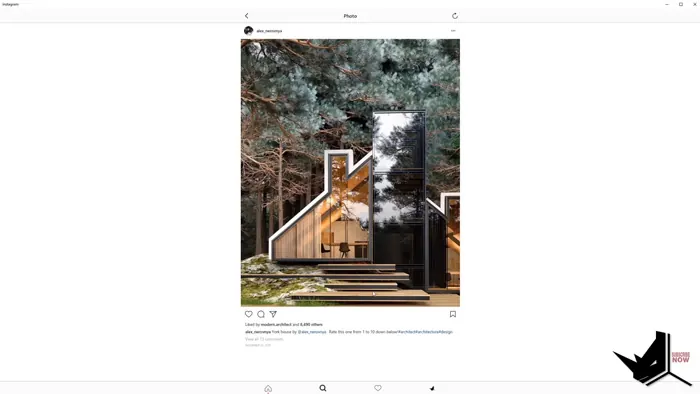
Welcome to this tutorial on modeling the stunning York House in Rhino! Designed by Alexandra Fedorova, the York House proposal features a beautiful modern design surrounded by nature.
In this comprehensive tutorial, you'll learn step-by-step how to model the York House using Rhino's powerful tools and capabilities. We'll go over some tips, tricks, and best practices along the way to help you master architectural modeling in Rhino.
Overview of the York House Project
The York House proposal consists of simple, minimalist shapes wrapped in huge glass windows to let in ample natural light. The house features a long, rectangular layout with slanted rooflines.
Wood cladding and large boulders integrate the home seamlessly into the forested landscape.
Before we dive into the Rhino modeling, let's briefly overview the project:
- Designed by Alexandra Fedorova, a talented Russian architect
- Features modern architecture focused on indoor-outdoor living
- Surrounded by nature with floor-to-ceiling glass walls
- Rectangular shape with slanted rooflines
- Wood cladding and boulder accents
Now, let's look at how to model this stunning architectural project in Rhino step-by-step.
Starting the Modeling Process
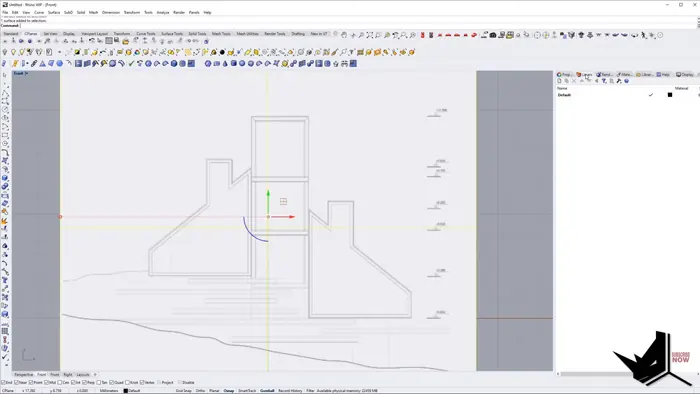
To start, we'll import the elevation and floor plan images into Rhino. After positioning them, we can trace the outlines to create surfaces.
Some tips during this initial phase: Use rectangular shapes and the Trim command to neatly frame the reference images. After that, create guidelines spaced apart to indicate the building width. Using the Scale command, bring the surfaces to proper sizing. Set the images to a transparent material so the lines are visible, and make layers for different objects like "Images" and "3D" to stay organized.
Taking it slow and methodical here will pay off later when modeling in 3D.
Modeling the House Form
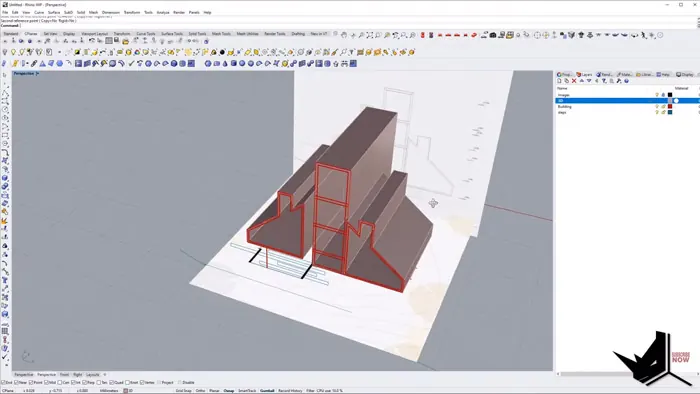
With the 2D surfaces mapped out, we can start extruding them upward to create our basic house form.
First, we will lock the reference images before extruding and then use Set Point to lift surfaces to the proper height. Matching layer colors makes it easier to see the shapes. Refer often to the images when deciding heights. In order to create windows, we will cap the surfaces and add thickness. Use commands like Split to divide up window sections.
Don't worry about perfection yet - just get the overall massing and layout right. Details come later!
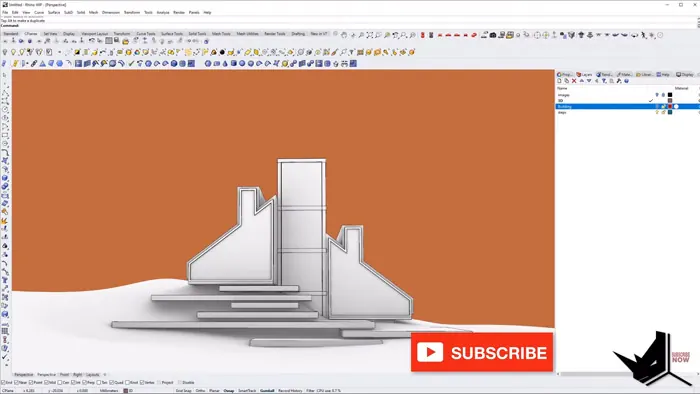
Adding Exterior Details
Now we can focus on exterior finishing touches to mimic the York House design:
- Use Offset and Inset to create depth on surfaces
- Pay attention to overhangs and extrusion lengths
- Split up surfaces to make distinct sections
- Scale down certain sections to create offsets
- Duplicate edges to make window dividers
- Use Offset Surface for window depth
- Create steps with Planar Surface and Extrude
Referencing the images closely will ensure accuracy as you model.
Shaping the Terrain
The landscaping is a key part of the York House's seamless integration with nature. Here are some tips for modeling the terrain:
- Extrude existing guide curves for quick shaping
- Rebuild and add points for smoother lines
- Use multiple Rail Revolve shapes for an organic look
- Output terrain as SubD for easy editing
- Refine terrain by moving SubD vertices
- Add edges to enable vertex tweaking
Don't be afraid to tweak and sculpt the terrain - it's a key part of this house!
Completing the Model
After finishing the major house elements and terrain, go back through and refine, edit, and embellish. Some ideas:
- Review dimensions and scale
- Add more complexity to surfaces
- Sculpt terrain to your liking
- Create boulders, plants, trees
- Make foreground elements like steps
- Adjust lighting and render settings
Take your time perfecting all the details - it will pay off in the final rendered views!
Key Takeaways
Modeling the York House in Rhino is a great learning experience for architectural visualization. Some of the key tips to ease the process are to follow a methodical workflow from 2D to 3D, use images for reference and accuracy, and organize your file into layers and groups.
Additionally:
- Model forms first, then add details
- Refine terrain since it's a focal point
- Embellish with custom modeling and lighting
The York House showcases Rhino's incredible capabilities for architectural modeling. Follow this full comprehensive tutorial with project files to learn techniques you can apply to your own projects!

Rhino for Architects Course
Give your architectural skillset a major boost with the Rhino for Architects Course. Get over 60 hours of focused training tailored specifically for architects. Master commands and techniques to model, render, and animate architectural visualizations at the highest level. Click below for more information and watch your designs come alive!


![Rhino for Architects Tutorials [Crown Hall with TIPS and TRICKS]](/images/blog/featured/variants/crown-hall-modeling--related-card.webp?cb=seo-meta-20260227-164423)