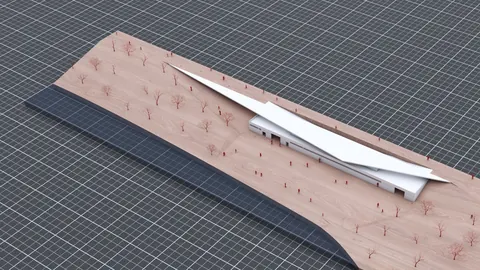
Architectural drawings don't have to be boring. With the right workflow, you can create stunning 3D sections that combine line work, shadows, and renderings for presentation-ready drawings that impress clients. In this post, we'll walk through a step-by-step tutorial on how to export 3D sections from Rhino to Illustrator to create drawings that wow.
Overview
The goal is to take a 3D model from Rhino and export the key elements we need to compose a polished 3D section in Illustrator. The complete rhino to illustrator section workflow will include:
- Creating 2D line work from 3D geometry in Rhino
- Exporting lines, outlines, and renderings from Rhino
- Compositing layers in Illustrator
We'll go over each step in detail below. The result will be a beautifully rendered section ready for portfolios and client presentations.
Step 1 - Generate 2D Lines in Rhino
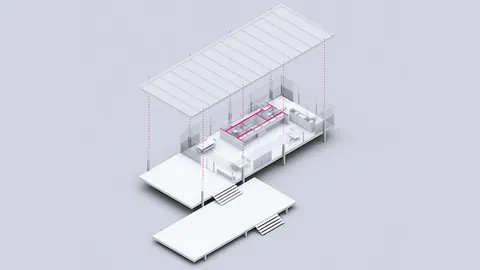
First, we need to extract 2D line work from our 3D model. In Rhino, make sure you have a clipping plane in place to cut a section view.
Use the "Make2D" command to generate lines from the 3D geometry. Make sure to set options like "Draw closed polylines" and "Draw curves" to get clean lines.
You may need to run Make2D a couple of times - once for the full model and once for just the cut geometry. This ensures you get a full outline and the section detail lines.Use Trim and other commands to clean up the lines and compose on layers (like "Outline" and "SectionLines").

Step 2 - Export Key Layers and Renderings
With clean 2D line work composed, export vectors for use in Illustrator.
Select geometry and use "ExportSelected" to export DWG or AI files for each key layer. For example, the outline, section lines, etc.
Also, render a clay model view matching the section plane. The rendering will provide tone and context. Save as a PNG or PSD so it's easy to bring into Illustrator.
Now you have all the key ingredients - lines, outlines, and renderings from Rhino ready to bring together.

Step 3 - Composite Layers in Illustrator
Create a new Illustrator file at the same size as your rendering. Then import the vector layers and rendering.
Compose layers on top of the rendering to build up the section. Make sure to organize in groups and adjust colors/stroke weights.
The rendering provides tone and materiality. The outlines show the overall form. The section lines add detail and depth.
Use pathfinder tools to fill sections and isolate elements. This lets you customize the look and feel.

Step 4 - Enhance Details
To take the section to the next level, use Illustrator's tools to enhance details:
- Adjust stroke weights and colors for the desired look and feel
- Modify stroke corners to add crispness
- Apply gradients or texture fills to elements
- Add selectively blurred shadows
- Overlay rendered entourage like people or furniture
With so many options, you can dial in the exact illustrated style you want.
Benefits of a Rhino/Illustrator Workflow
Why go through the hassle of this workflow vs. an all-Rhino or all-Illustrator approach? Some key benefits include:
- Rhino for accurate and fast 3D modeling
- Illustrator for powerful vector illustration capabilities
- Maintain editability by keeping vectors separate
- Ultimate control over style and presentation
- Reusable assets, layers, and blocks
- Ability to update and iterate quickly
With some practice, this combined workflow enables incredible illustrations that live up to design concepts. Conveying designs effectively is crucial, and stunning sections like these go a long way in impressing clients and winning work.To learn more, be sure to check out the full tutorial on YouTube. There is also an extended version for Patreon supporters that covers additional Photoshop compositing tips.

Rhino for Architects Course
Give your architectural skillset a major boost with the Rhino for Architects Course. Get over 60 hours of focused training tailored specifically for architects. Master commands and techniques to model, render, and animate architectural visualizations at the highest level. Click below for more information and watch your designs come alive!