Modeling architecture designs and creating facades is an essential part of the design process. With the right tools and techniques, you can quickly model simple facades in Rhino. In this guide, we'll walk through a simple modeling process to create a modern building facade from a 2D image.
Overview
Simple facade modeling in Rhino allows you to take a 2D image and extrude it into a basic 3D model. We'll use common Rhino tools like Extrude, Planar Surface, and Fillet to go from 2D to 3D.
The steps we'll cover include:
- Importing a 2D image
- Tracing the 2D shapes
- Converting lines to closed polysurfaces
- Extruding surfaces and lines into 3D
- Adding depth and details
The result will be a clean 3D model ready for rendering and visualization.
Step 1 - Import the 2D Image
First, import the 2D image you want to model into Rhino. You can bring in JPGs, PNGs, and other formats.
Resize the image and lock it in place as a reference. Reduce the transparency so you can see the lines clearly.
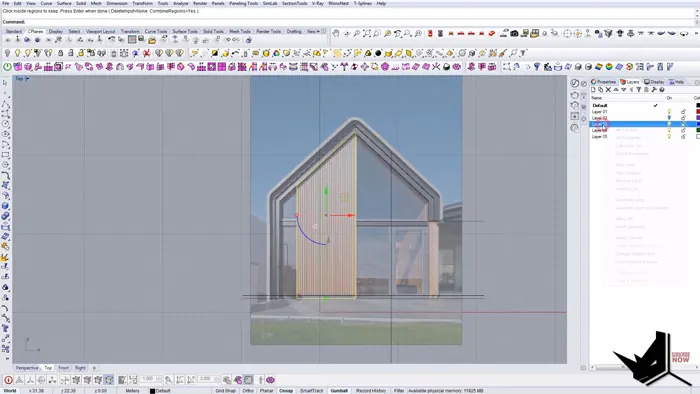
Step 2 - Trace the Major 2D Shapes
Now trace over the major 2D shapes using Rhino's line and polyline tools. This will become the basis for extruding into 3D.
Use ortho and snap tools to quickly lay down precise lines on top of the image. Lean on Rhino's robust 2D tools like Trim and Extend for fast editing.
Step 3 - Convert Lines to Closed Polysurfaces
Next, we need to convert the open lines and shapes into closed polysurfaces. This will allow us to extrude them into solid 3D forms.
Use the Boolean curve tool to select lines and quickly convert them to closed shapes. This saves time versus trimming manually.
Delete any extra lines and geometries so just the closed polysurfaces remain.
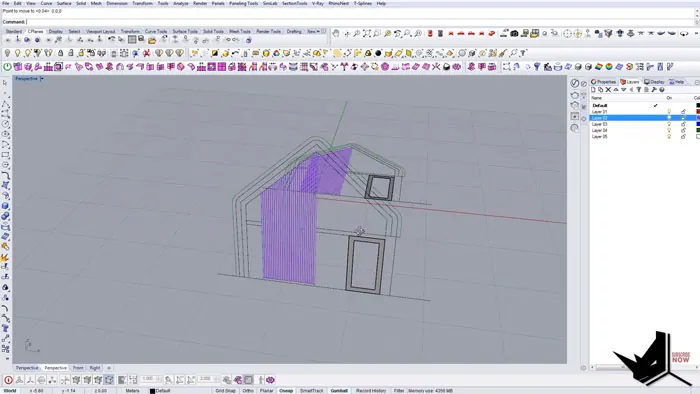
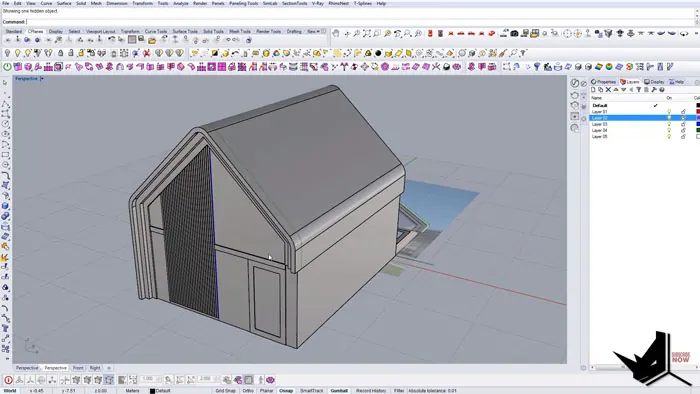
Step 4 - Extrude Shapes into 3D
With the 2D polysurfaces ready, we can push them into 3D by extruding them.
Select shapes like the window panels and extrude them upwards to create depth. Use varying extrude distances to add different depths.
This transforms the 2D outlines into 3D surfaces and forms.
Step 5 - Refine Geometry
Finally, refine the geometry to match the design intent.
Use techniques like fillets to round corners. Adjust extrusion amounts and add additional surface details.
Review the model in perspective to identify areas needing tweaks.
Recap
The simple facade modeling process in Rhino transforms a 2D image into an extruded 3D model by:
- Tracing major 2D shapes
- Converting lines into closed polysurfaces
- Extruding surfaces into 3D forms
- Adding fillets and edge details
In just a few steps, you can take a simple image and create the foundation for a building facade design in Rhino.
The same process can be used for other architectures and designs. Simple facade modeling is a fast way to generate 3D concepts from 2D images.
Conclusion
Rhino offers many powerful tools for architects and designers. Mastering core modeling techniques like simple facade creation helps you bring your visions to life faster.
What modeling challenges have you faced in Rhino? Share your experiences in the comments below!

Rhino for Architects Course
Give your architectural skillset a major boost with the Rhino for Architects Course. Get over 60 hours of focused training tailored specifically for architects. Master commands and techniques to model, render, and animate architectural visualizations at the highest level. Click below for more information and watch your designs come alive!