Architectural railings are an essential design element that can completely transform the look and feel of a space. With Grasshopper and VisualArq, you can easily create stunning custom railings for your architectural projects. In this post, we’ll walk through a step-by-step tutorial for modeling a custom railing design from scratch using Grasshopper and VisualArq.
Overview
VisualArq is a powerful Grasshopper plugin that allows you to create custom architectural elements and styles for use directly within ArchiCAD. With VisualArq, you can build parametric Grasshopper definitions and export them as ArchiCAD styles. This makes it easy to create complex geometries and bring them into ArchiCAD for documentation and visualization.
In this tutorial, we’ll use Grasshopper and VisualArq to model a custom railing design. We’ll start in Rhino to create the basic railing profile geometry. Then in Grasshopper, we’ll build out the definition, adding parametric controls. Finally, we’ll export the Grasshopper definition as a VisualArq Railing style for use in ArchiCAD.
Modeling the Base Geometry
We’ll start by modeling our basic railing profile in Rhino. This will give us the underlying curves and surfaces that we’ll bring into Grasshopper:
- Draw lines to create the overall railing envelope
- Add circles and rectangles to create railing posts and horizontal elements
- Join the lines into a single curve and pipe for the railing profile
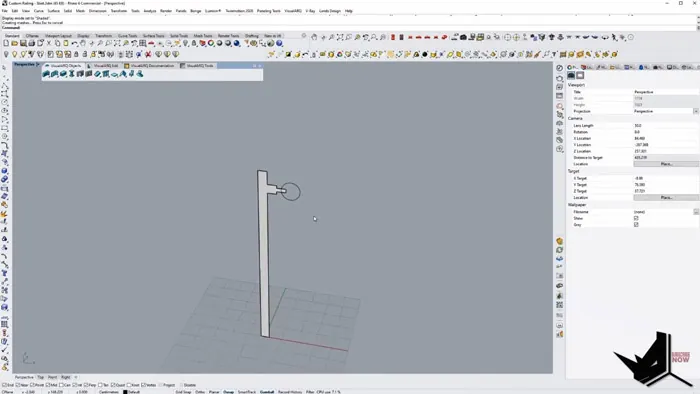
With the base geometry modeled, we can bring it into Grasshopper to start building out our custom Grasshopper definition.
Building the Grasshopper Definition
Inside Grasshopper, we’ll take the Rhino curves and start adding the parametric controls:
- Import path curve from Rhino
- Create rail post geometry
- Add thickness parameter
- Array rail posts along the path
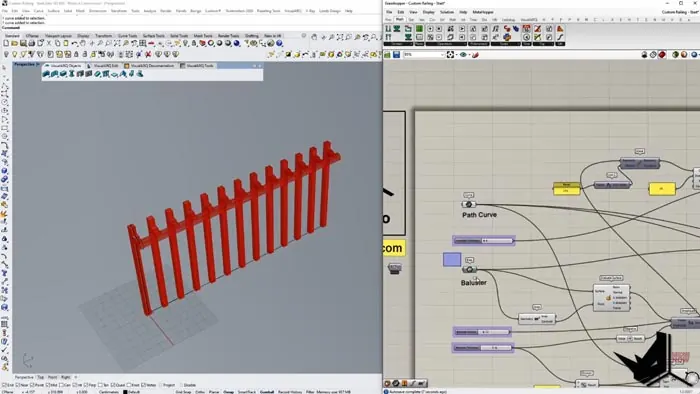
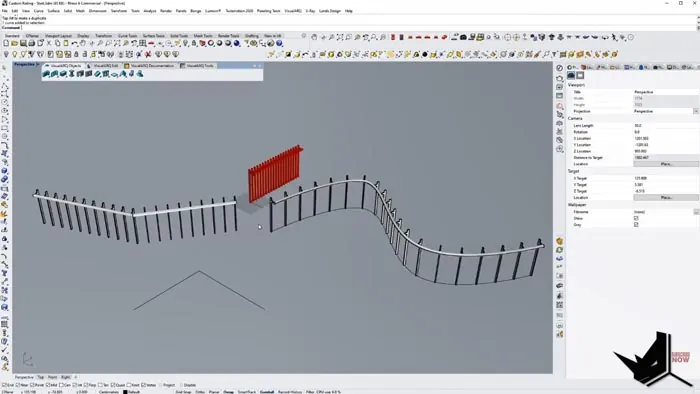
The key is to build flexibility into the definition by adding numeric sliders and other parameters. This will allow us to easily modify the railing design.
We can control things like:
- Railing post thickness
- Post spacing/density
- Handrail dimensions
As we build out the definition, it’s important to use breps and geometry components for the final output. This will allow the railing to export properly from VisualArq into ArchiCAD.
Exporting as a VisualArq Railing
With our Grasshopper definition completed, we can now export it as a custom VisualArq Railing style.
Inside VisualArq:
- Right-click on Railing Styles
- Select Grasshopper Style
- Choose the Grasshopper file
- Name the style
- Set parameter names
This creates a new railing style that we can apply in ArchiCAD. We can even duplicate and modify the style to create variations.
Now in ArchiCAD, we can simply model lines and apply our custom railing styles with ease. The parametric controls make it simple to adjust the design on the fly.
In addition to all of this, we have another tutorial on VisualArq Railing methods. You can check it out below.
Conclusion
Creating custom VisualArq railing with Grasshopper opens up new possibilities for architectural design. This parametric workflow makes it easy to model complex geometries and bring them into ArchiCAD as styles.
The ability to quickly iterate on railing designs enables architects to explore many options. With full control over the aesthetic and functional qualities, it’s possible to dial in railings that are tailored to your exact project needs.
If you're interested in learning VisualArq from scratch, you can check out our course below which has a whole module dedicated on learning VisualArq.

Rhino for Architects Course
Give your architectural skillset a major boost with the Rhino for Architects Course. Get over 60 hours of focused training tailored specifically for architects. Master commands and techniques to model, render, and animate architectural visualizations at the highest level. Click below for more information and watch your designs come alive!