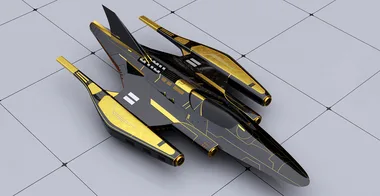
Futuristic Jet Project
Build a futuristic sci-fi aircraft from scratch in Rhino, starting from a single Midjourney concept image and working through SubD modeling, surface detailing, Vray rendering, Photoshop post-production, and 3D printing with Bambu Studio.

This mini course follows the complete production pipeline of a sci-fi aircraft chosen by a community vote. You will start with nothing more than a single AI-generated reference image and learn how to translate it into a workable 3D model. The process begins with 2D proportion sketching directly in Rhino, moves into SubD modeling to establish the overall hull and engine shapes, and then transitions fully into surface modeling to create the panels, details, seams, and inset geometry across the wings, tail fin, and engine nacelles.
Once the modeling and detailing stages are complete, you will set up a complete Vray rendering scene, choose and configure materials including metallic car paints, chrome, and gold, and adjust HDRI lighting to produce a production-quality render. From there the course covers Photoshop post-production to enhance the final image and then walks through the full process of preparing the model for 3D printing in Bambu Studio, including repairing geometry, closing naked edges, slicing the model into printable parts, and painting multi-color filament assignments. The course ends with a look at the physical printed result in white, gold, red, and black filament.
- How to use Rhino's SubD tools (extrude face, insert edge, crease, reflect, offset SubD) to block out a symmetrical aircraft hull from a 2D proportion sketch
- How to use SubD Crease and SubD Smooth percentage controls to achieve sharp edges, soft transitions, and tapered trailing edges on engine nacelles and wings
- How to convert SubD geometry to NURBS polysurfaces and use Split, Sweep 2, Patch, Pipe, and Offset Curve on Surface to create panel lines, inset gaps, and surface details
- How to project 2D overlay curves onto curved surfaces to generate accurate seam and panel cut lines across the hull
- How to use the Cage Edit command to deform non-developable NURBS surfaces when SubD control is no longer available
- How to apply materials in Vray for Rhino including car paint, chrome, metallic gold, and custom floor materials, and how to configure HDRI dome light settings for clean product rendering
- How to perform Photoshop post-production on a Vray render, including color grading with Curves and Levels and adding a colorize overlay at reduced opacity for tonal atmosphere
- How to close naked edges in a complex NURBS model to make it watertight for 3D printing, using Show Edges, Join, Boolean Split, and Extract Surface workflows
- How to export to STL, import into Bambu Studio, repair mesh errors, orient the model for optimal layer direction, enable auto-supports, and assign multi-color filament zones using the paint bucket tool