
Viewport capture Input
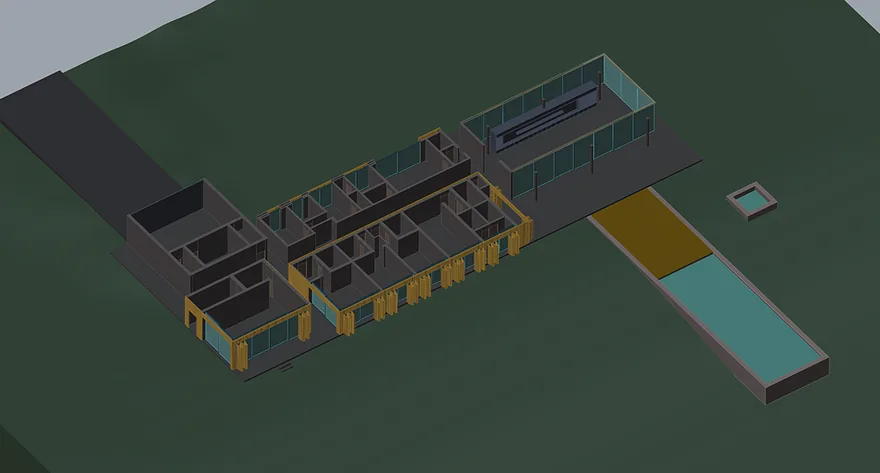
Grab the active Rhino viewport in one click, in shaded, rendered, or any display mode you already use.
Rhino 8 plugin / Free Beta Access
Capture your Rhino viewport and turn it into AI imagery through a simple, node based workflow. Describe it, rewire nodes, and iterate fast, all inside Rhino.
Why RhinoFrame
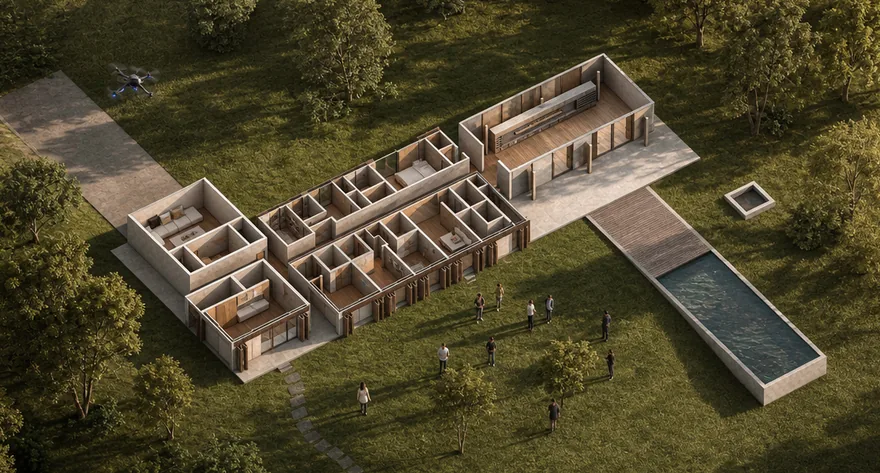
Capture your viewport and turn it into a finished AI render without exporting screenshots or leaving the model. Compose the look as a simple node graph, the way you already think in Grasshopper, and iterate until it's right in seconds.
Free during the beta
While we're in beta, everyone who signs up gets full access at no cost. Early users help shape where RhinoFrame goes next, and the people who join now will get the most out of it as it grows.
The building blocks
Each part of your render is its own node. Mix them on the canvas, swap one out, and re-run. Here's what each one does.
Grab the active Rhino viewport in one click, in shaded, rendered, or any display mode you already use.
Describe the render in plain language, or leave it empty. Time of day and weather dropdowns set the light without typing, and optional AI enhancement turns a quick line into a richer prompt.
Pick one of 12 built-in styles or drop in your own image, then set how far the look goes, from matching the reference to fully photoreal.
Bring your own look. Drop any image on the canvas and wire it into the Style node, or drop it straight on a frame's STYLE input. The render takes on its style, and the slider sets how strongly.
Draw a freeform mask on a render and write a note. Only that area changes, without re-rolling the whole image.
Draw straight onto a canvas, with pen, eraser, and notes, to steer composition and detail before you render.
Wire any two images into A and B and drag the slider across. Swap sides or open a synchronized full-screen view.
Grow the canvas around a render with a preset or by dragging an edge. The new space is painted to match and your original pixels stay untouched.
Rhino 8 on Windows and Mac.
How it works
Frame the shot in any Rhino 8 viewport and hit capture. RhinoFrame grabs the view in whatever display mode you're working in, shaded, rendered, or your own, so the AI starts from your real geometry instead of a screenshot you exported and re-uploaded. A safe-frame preview shows exactly what will be sent.
Describe what you want in plain language, then shape the result with nodes: built-in styles, reference images, sketch guidance, and local edits. Wire them together on the canvas the same way you build a definition in Grasshopper, and swap any piece without starting over.
RhinoFrame routes your setup to the right model for the job and renders in the cloud, with a credit estimate up front so there are no surprises. The finished image comes straight back into the canvas, right next to your inputs, ready to judge in context.
Change one node and re-render to explore variations, then wire two results into a Compare node and drag the slider until the shot is right. Need more room around the building? Expand the canvas without touching the render. Save the result back into your Rhino document and keep the whole setup as a reusable workflow for the next project.
Two ways to work
Capture, pick a style, hit render. A safe-frame preview, a credit estimate, and a result. Nothing between you and the shot.
A node canvas where viewports, prompts, styles, references, edits, and sketches connect into a workflow you can save, reuse, and share.
New in September 2026
The Style node now comes with 12 built-in looks and a slider that sets how far each one goes, and new renders run on OpenAI's GPT Image 2.5. All of it is live now for everyone in the beta.
Pick a look straight from the Style node. Twelve built-in styles cover photoreal, physical model and clay renders, illustration looks like Ligne Claire and Flat Design, clean diagrams, and hand-drawn marker, watercolor and pencil. Click a tile and render. Prefer your own look? Drop in any image and it becomes the reference instead. Simple Mode has the same grid.
Every style comes with a four-stop slider. Match reference copies the look as closely as it can. Stylized and Illustrated bring in more light, depth and material. Photoreal sets the reference aside and renders your model in its own colors. Render a few stops from the same capture and keep the one that fits.
New renders now run on GPT Image 2.5, OpenAI's newest image model. Light, texture and fine detail come back sharper, and the render stays on the geometry you captured instead of drifting into a similar building. It works with every node you already use, and GPT Image 2 is still in the model menu when you want it.
Advanced mode
Advanced mode gives you a node canvas where viewports, prompts, styles, references, and sketches connect into a workflow. Change one node and re-render, compare variations side by side, and save the setup to reuse on the next project. If you know Grasshopper, you already know how this feels.
Try it in the beta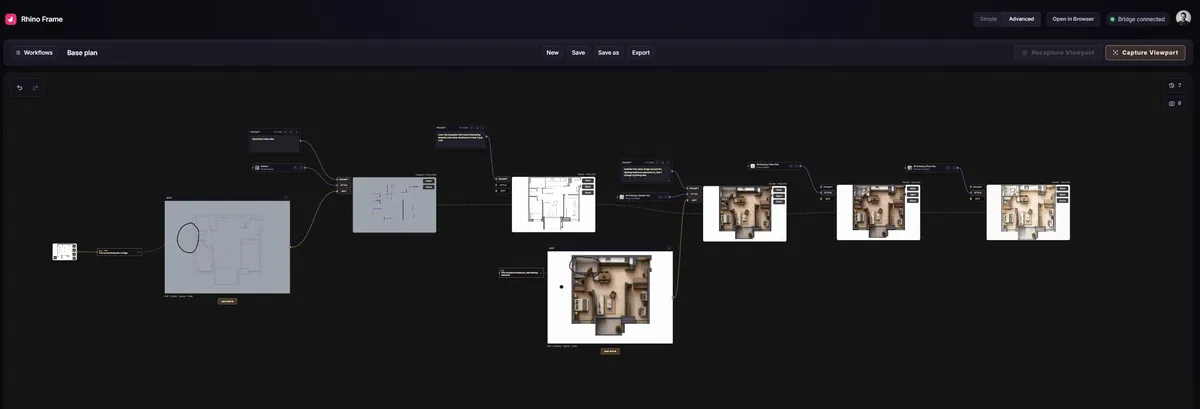
From the team behind
The education brand thousands of Rhino designers already learn from. RhinoFrame is built by people who use Rhino every day, for people who do the same.
We are Dusan and Lazar, the architects behind How to Rhino. Our mission is to reach as many architects as possible and help them learn Rhino and Grasshopper3D specifically for architecture.
We run a free community on Skool where we talk with students every day, a paid community with monthly workshops, mini courses, and live reviews, and intensive courses with a proven, step-by-step learning system.
How to Rhino is an official Authorized Rhino Training Center, approved by McNeel.
RhinoFrame is the software product of How to Rhino doo, the company we founded in Belgrade, Serbia in 2022. It's the next tool we're building for the same people we teach every day.

15+
Years of experience
900
Students
90,000+
YouTube subscribers
102,562+
Instagram followers
211,562+
People in our community
Free beta
Request access and be among the first studios to render Rhino models with AI, right inside Rhino.
We'll email a verification link. No spam.
Already approved? Install RhinoFrame in a couple of minutes.
Your beta request is in. Two quick things, then a head start while you wait.
Install the plugin now so you're ready to render the minute you're approved.
PackageManager in the command line and press Enter.RhinoFrame.
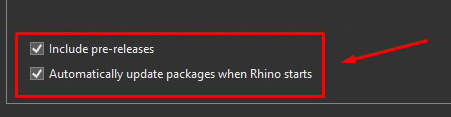
RhinoFrame in the command line to open the panel.Once you're approved, sign in inside the plugin with this email address to activate your starter credits.
RhinoFrame runs on the latest Rhino 8. Rhino 7 and Grasshopper components are planned for later phases.
Both. RhinoFrame runs on Rhino 8 for Windows and Mac, installed the same way on each through Rhino's built-in Package Manager. See the install walkthrough.
You compose the render as a node graph, so you control the prompt, style, reference images, and how the scene is interpreted. Iterate quickly by changing nodes and re-rendering until it looks right.
While RhinoFrame is in beta it's completely free to use. When we introduce pricing later, we'll share the details well before anything changes.
RhinoFrame is in free, open beta. Sign up using the form above, confirm your email, and you're in.